HOME | DD
 lithriel — Step by Step of a Realistic Portrait (Tink)

Published: 2012-09-18 02:06:12 +0000 UTC; Views: 56343; Favourites: 2161; Downloads: 5670
Redirect to original
Description
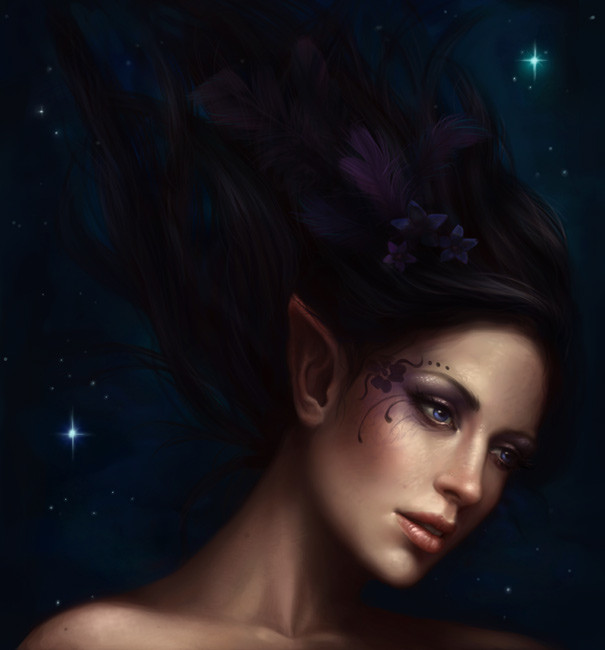
Here is that promised step by step of my Tink piece. It's more of a tutorial format but when I get some more free time I'll do a quick movie step by step of the process which I will link here. Please download the PDF for the full file.You can find the original image here- [link]
PLEASE NOTE: This tutorial assumes you already know how to draw well, that you have a Wacom drawing tablet with pressure sensitivity and a stylus, and that you have a recent edition of Photoshop and know how to use it.
You'll need Nathie's brushes which can be found here- [link]
If you are interested in DAZ studio you can download it here- [link]
If you want the model I used you can buy it here- [link]
For an in-depth tutorial of how to light a scene in DAZ please see this- [link]
Related content


Comments: 86

Do your brush settings look like mine? With opacity and flow set to pen pressure? If so, then you may want to change your brush to the soft round brush more often. It softens the look of it. I don't recommend it for the block-in, but once you have established the structure, it can be used to help blend in colors.
👍: 0 ⏩: 1

the 'normal' soft brush?
yes, i have set up a brush as in your tutorials. i never thought of using the pressure to affect the opacity/flow. and i always used the standard 'shop soft brushes, so i never realized how useful a harder-edged one can be.
i have found more tutorials, with one that defines the blending process part. which goes something like this:
paint the one colour.
paint the second colour.
overlap them a bit.
sample the in-between colour that results from the overlap.
paint that over the first colour and the middle colour. paint it over the second colour and the middle colour.
keep sampling the in-between colours and doing them by halves...
and i have discovered that if i tried to do THAT, i would go nuts. i do not have the patience.
i have found a different method tutorial, that has a very nice blending brush using the smudge tool -- that doesn't look like the ugly smeary smudge tool. i've been working with that.
i do want to thank you for taking the time to get back to me. the transitionary phase has always been a blocking point for me, even in traditional media. (i think i actually really hate painting, and only enjoy drawing : X )
👍: 0 ⏩: 1
No, you need a tablet with pressure sensitivity installed, otherwise your painting will not blend naturally and you have to do it "the hard way", which is the way you just described. Pressure sensitivity set to opacity and flow make all the difference. You don't have to think about the colors building up or blending, they just do.
👍: 0 ⏩: 2
if you have time, i have a really dumb question about the pore brushes and layer... i sample the colours of the skin to paint the pores, but... i can't see anything because it's painting dots of the same colour as the background layer....! is there a special trick or technique to this? or i'm not understanding it correctly.
oh, are there special settings for the pore brushes? i mean, to use with the brush shapes?
thanks so much for all your help!
👍: 0 ⏩: 0
ohhhhhh.... okay!
i still get a little frustrated with it... i tend to have a light touch on my tablet, and i never seem to grind the nib hard enough to get the 100% effect. that, and i prefer drawing to painting. all that switching colours gets to me, too. ; )
i'll give it another shot and see if it works with the conglomerate technique i'm building up. thanks!
👍: 0 ⏩: 0

I featured your tutorial in my journal today!
Here's the link if you'd like to check it out - fav.me/d6k39b7
👍: 0 ⏩: 0

Cool tutorial! I'll have to try DAZ Studio because I'm tired of always searching for perfect references...
")
👍: 0 ⏩: 0


Thank you so incredibly much for this! 
It helps so much!

👍: 0 ⏩: 0


wow!! soooo much detail!! <3 wicked work, thanks!! ^_^
👍: 0 ⏩: 0

Thanks for creating this. I just started using DAZ to help me with references when I can't find anything online. Do you use the same model for your references or do you have a few different ones?
As for adding pores to the painting, do you brush over the same colour with the same colour or do you put a lighter colour over a darker one? I've tried adding pores before and it ends up looking rather spotty and odd.
👍: 0 ⏩: 1
I morph the face on DAZ to suit my needs. I have purchased a few of Danae's characters which are really good- Milan, Paris, and Lyon. They are a good starting point and then I morph them to whatever I need.
I try to keep the value the same when done so it's a delicate back and forth process until it looks right. It does take time and finessing.
👍: 0 ⏩: 1
I'm still learning the points around DAZ because I haven't used it in years. I've only had limited exposure to Maya and Poser when they first came out years ago.
I'll have to check out those models and thank you for the tips.
👍: 0 ⏩: 0


Nicely done! I really should think about using 3D for reference more, especially since I work as a 3D artist!
👍: 0 ⏩: 0

I have potentially a really stupid question, so I apologize ahead of time, but here it is: how long have you been painting/drawing?
👍: 0 ⏩: 1
Since I could pick up a crayon I've been feverishly drawing when not doing anything else. That would make it 24 years now (I'm 27). I started drawing realistic portraits at age 13. I went to college and got a bachelor's degree in Integrated Studio Art and graduated 4 years ago. You can see my old high school stuff in my misc folder- [link] (age 17 for a lot of it).
👍: 0 ⏩: 1
Thank you. I was just curious because I've been drawing [while attempting, at least] to draw realistic portraits just with pencil and paper for several years, but I just recently got into digital painting, and it seems like everyone just picks up their tablet and Photoshop and presto! amazing paintings. It's nice to see a little more of the process sometimes. (:
👍: 0 ⏩: 1
I also studied web design for many years before I started digital painting so I knew the software very well from the start. I did have a bumpy first year of learning how to paint digitally but I think I have the hang of things now.
👍: 0 ⏩: 1
So do you actually work as an artist full-time? I'd definitely say you've gotten the hang of it!
👍: 0 ⏩: 1
Yes, I work as a professional illustrator. I can't say I work full time because I have two kids to watch with a third on the way. Once they are all in school (my oldest is turning 4 next week), then I will be officially full time.
👍: 0 ⏩: 1
Wow! I imagine life's a little crazy for you right now. Congratulations, though
👍: 0 ⏩: 0
KakashiMorph [2012-09-19 23:09:16 +0000 UTC]
Great tutorial! I did not entirely understand how you blend the colors so well though. Do you use the eyedropper in the neighborhood color and overlap it between two different tones with an intermediate one so that it ends up like a rough gradient?
👍: 0 ⏩: 1
No, I rely on the pressure sensitivity of my stylus and tablet to seamlessly blend together the strokes as I go. If you don't have the correct brush settings, the colors don't blend at all.
👍: 0 ⏩: 1
KakashiMorph In reply to lithriel [2012-09-20 06:12:44 +0000 UTC]
I used the method I described on my only attempt at realism but it took me forever to blend them (probably because I press too hard? I do use hard round brushes too, maybe I should switch to soft round ones?). It was painfully slow which is why I asked.
👍: 0 ⏩: 1
Do your brush settings look exactly like the picture shown in the tutorial? If it's selected and your brush doesn't appear to be fading in the little preview picture then your drivers are not properly installed.
👍: 0 ⏩: 1
KakashiMorph In reply to lithriel [2012-09-20 21:47:10 +0000 UTC]
I don't remember, I will have to check it the next time I plug in my tablet and play with it.  (Smile)")
Or maybe I should try soft round brushes as well.. I'll let you know how it goes the next time I try!
👍: 0 ⏩: 0


Thanks! It's good how you went right through all the steps.

👍: 0 ⏩: 0

You have no idea how happy reading this made me. Thank you for the amazing tips.
👍: 0 ⏩: 0


Thanks! This is a very nice tutorial. Though I don't paint humans much, the steps will be very useful, and I can apply some of the things to other works.
👍: 0 ⏩: 0


")


Great tips! I never thought about using my own 3D models for reference before. This will be really helpful whenever I finally get the time to start digital painting or maybe drawing in general. This is a good technique, especially for someone like me who is too shy to ask others to pose for me when I draw if I can't find a photo reference or anything like that.
👍: 0 ⏩: 1
DAZ is so awesome for quick pose ref! Especially for built dudes. Saves having to pay for models which is nice too.
👍: 0 ⏩: 1
Yeah, I agree! It just takes a little getting used to after a while.^^
👍: 0 ⏩: 0
| Next =>