HOME | DD
 manic-goose — Tutorial How to color skin
Published: 2007-03-09 21:47:40 +0000 UTC; Views: 15357; Favourites: 101; Downloads: 320
Redirect to original
Description
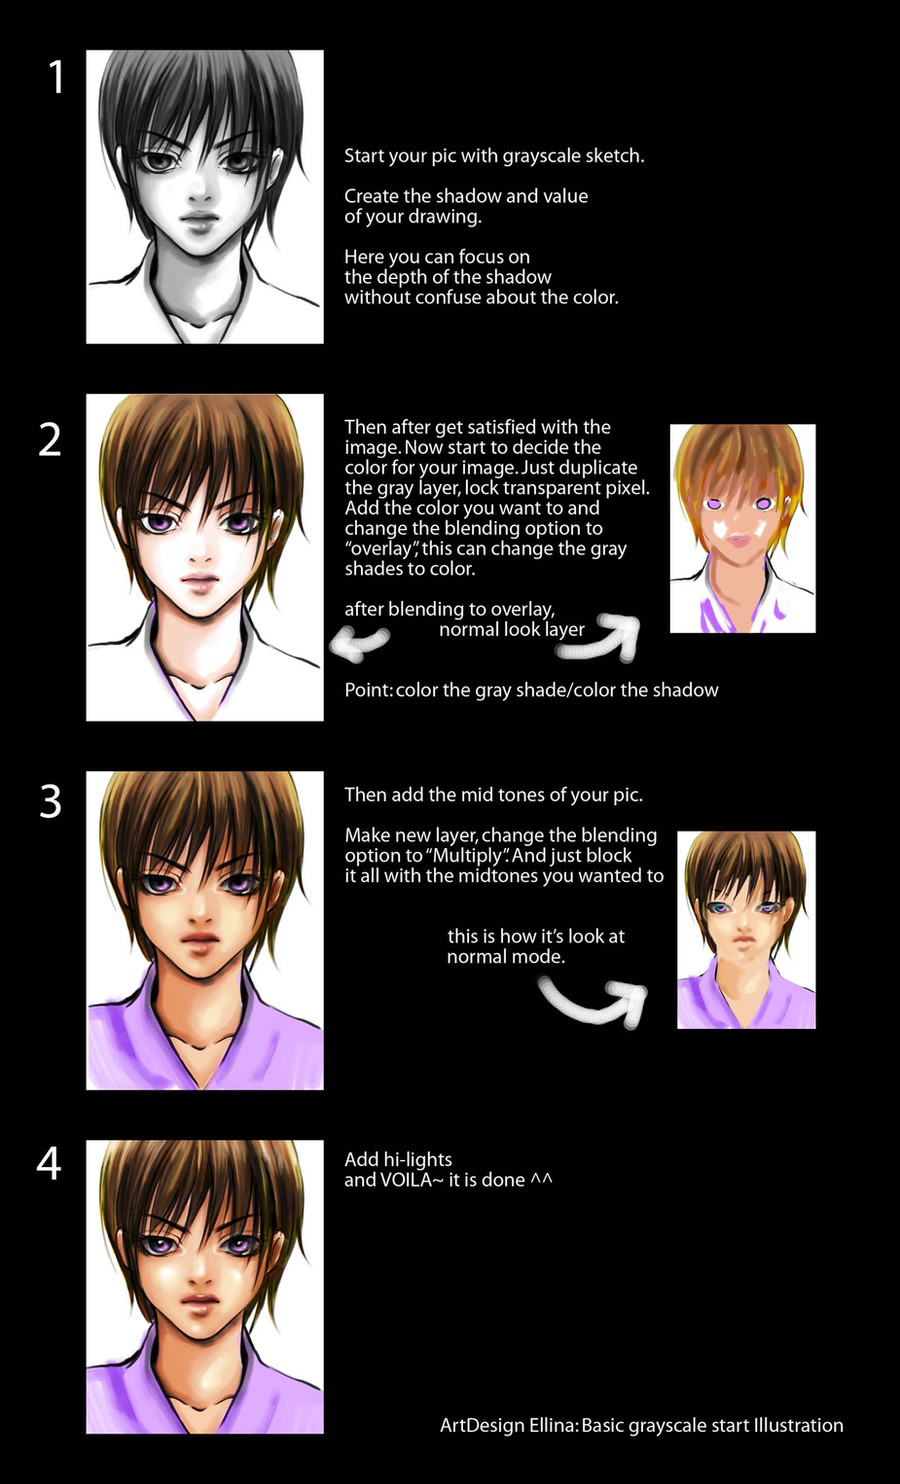
How to color skin: TutorialThis tutorial is a general guide in coloring and shading skin. Coloring skin on the computer is easy. You just pick a color and fill it in, but the shading is the big part. You can use this tutorial to help in general coloring, or you can use it to try to recreate this image. The choice is yours, but please remember that if you use this to recreate this image exactly, remember to give credit to me for both the original drawing and the original character, Ko-Chan. ^__^ Thanx, and I hope this helps.
If you need any help in specifics such as working with layers, feel free to ask.
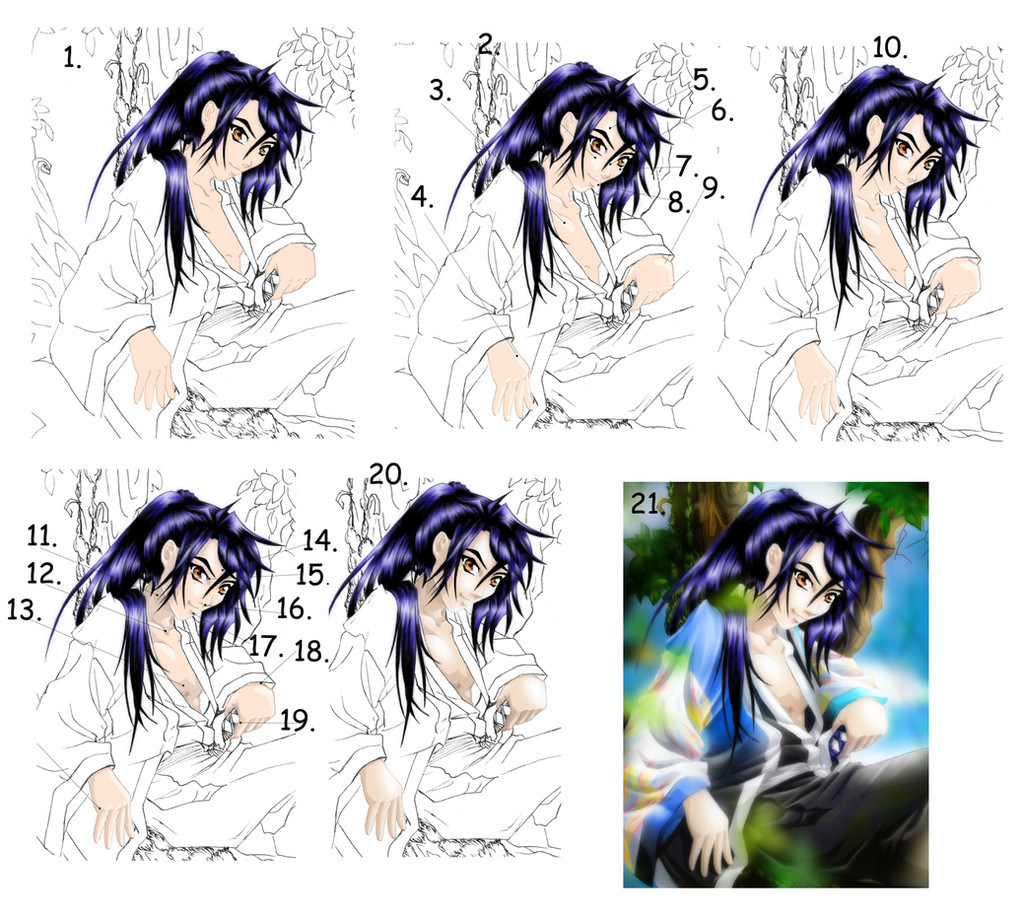
1. You need to color the skin with the base color… that is the skin color. ^__^ In photoshop, I color everything on a separate layer, I color directly over the lines too, this makes the black of the line change to a darker shade of what ever color you are using. So make a new layer that is 75% opaque. The skin color that I used is # FFDCC4. In the color choosing box, you can just type in the number by going to the bottom box on the right side next to the ‘ # ’ symbol. Color the skin completely, going over the lines that represent skin, but not the lines that represent clothes.
2. Now you pick a light source direction. This light source is in the upper right corner. Do the light spots before doing the shadows. Make a new layer that is 60% opaque. With the paint brush, use white. On the cheek, make a kind of rounded triangle. Don’t worry about details and getting things perfect yet.
3. On the chest, a little light where the figure bends toward the light will help. Again, use a rounded triangle shape.
4. On the hand, color the edge closes to the light source, put a dot at each knuckle and color one end of the fingers.
5. Put a little light on the forehead, not directly next to the hair, because that area would be in shadow.
6. Put some light on the bridge of the nose
7. Put a little light on the far cheek as well, but not as much. Follow the curve of the cheek.
8. Put a dot of light on the lips
9. When a hand bends down, put some light on top of it.
10. Once you have all the light spots marked, go back with a smudge tool. Use one that is 100% hard. Push things into place, rounding out edges, making points, straightening edges, and pushing mistakes back into the lines.
11. No for the shadows. When working with shadows on skin, make a new layer that is 10% opaque. Put on the first initial shadow. This is the big shadow, and later come back with a new layer, again at 10% opacity, and put in a little detail that is a darker shadow. Use the same method here as used for the light. First mark everything, and then smudge things into exact place. When shading the neck, remember that most of it is usually in the shadow of the chin. I use two levels of shadow here, one that is right next to the chin and one that covers most of the neck. It helps to leave a little on shaded because this gives the neck a rounded feeling to it.
12. Put a bit of shadow in the middle of the collar bone.
13. Shade the stomach because it is bending away from the light and the clothes would also cast shadows on it. If neither of these is the case, don’t shade completely. Again, I use two layers of shadow. Leaving a little on shaded on the lower muscle gives a little dimension.
14. Put shadows under some of the hair. Where hair makes a sharp bend, add more shadow. This gives the feeling that the hair is bending away from the forehead.
15. Next to the eye, put a little shadow bending around the eye a bit.
16. Make the bottom of the nose dark. Use two layers to add detail. Ko-Chan’s nose shadow is a triangle.
17. Put a shadow under the lower lip. Make it a rounded triangle with a bend.
18. Put a shadow the arm shows through but is still under the clothes.
19. Put shadows on the fingers, where they bend away fromt eh light. This gives depth and sharpness to the hand.
20. There are two optional steps shown here. The first is that once you have all the shadowing done, you merge the layers. You can copy the layer, past it and then blur and then turn down the opacity of the blurred layer to soften the shading a little. For more info on how to do that, ask me. I also like to make a new layer that is 100% opaque, paint white directly over some of the larger spots of light, and then blur that layer. This one was blurred to 19. To blur a layer like this, go to filters, scroll to blur, and scroll to Gaussian blur. Click on that. Move the bar till the number in the box reads 19.
21. This last step is one that is done after the whole picture is colored. Because I am doing all the coloring and shading on separate layers, some of the color intensity is lost. I love colors, so I always turn up the saturation just a little bit when the picture is finished to restore the lost intensity. Be careful with this last step to not over do it. Another way to restore intensity is to turn up the contrast just a bit. Again, be careful not to over do it. To get at saturation go to image, scroll to adjustments and then scroll to saturation and hue. Click. To get to contrast adjustments, go to image, scroll to adjustments and scroll to brightness contrast. Click.
I hope all this helps, remember, if you have any more questions, feel free to ask.
Related tutorials using the same picture include:
General anime drawing guide, click here
drawing a three quarter angle face, click here
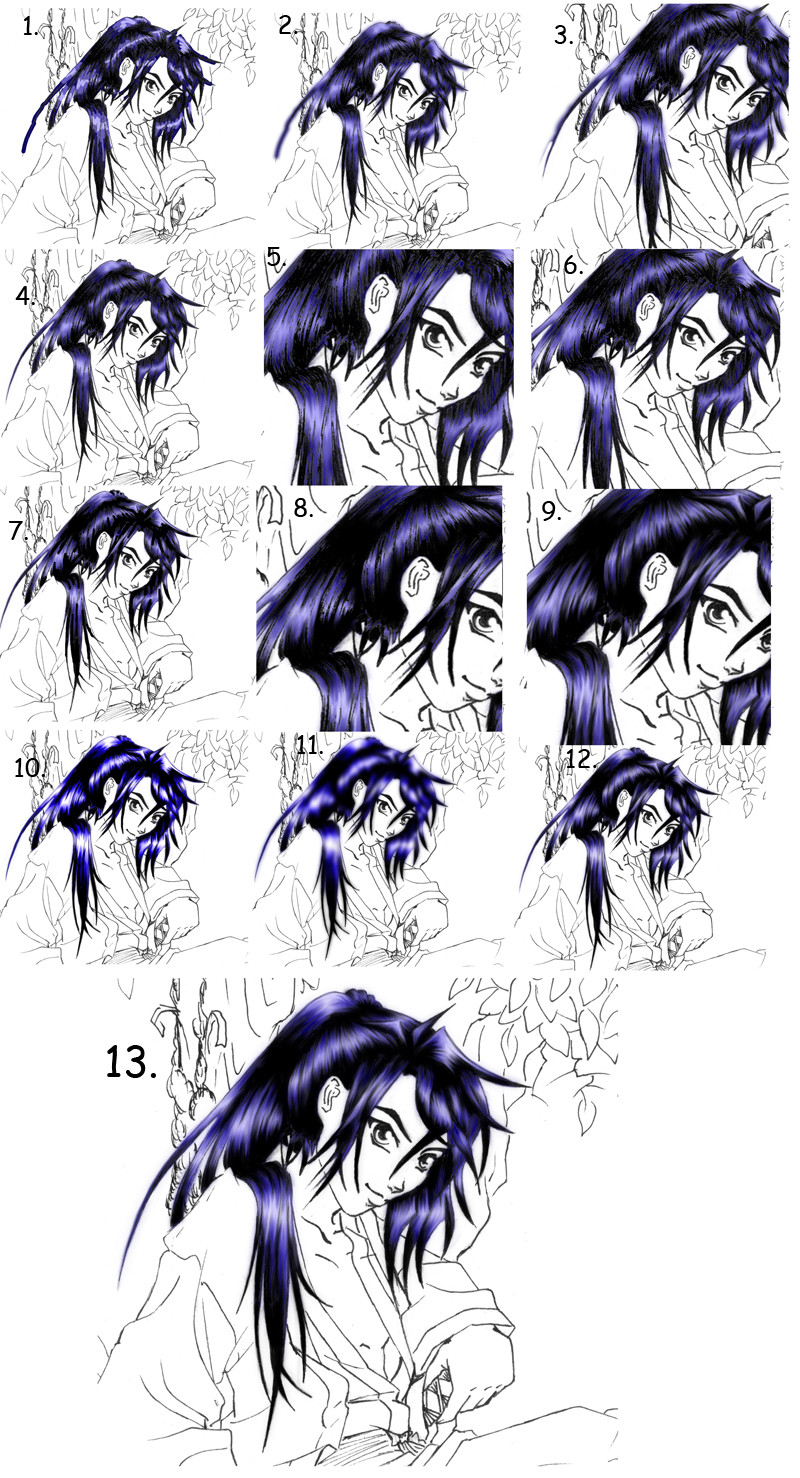
drawing Ko-Chan’s hair, click here
drawing clothes, click here
coloring dark hair, click here
coloring Ko-Chan’s clothes, click here
shading clothes, click here
Related content


Comments: 13

how did you color over the black lines so they didnt show?
👍: 0 ⏩: 1

Well I colored over them on a partially transparent layer.
👍: 0 ⏩: 0

 (Wink)")

wow this is really helpful thanks for posting it ^.^
👍: 0 ⏩: 1

thanks for the tutorial. do you use adobe photoshop?
👍: 0 ⏩: 1
can you teach me how to use path for photoshop^^
👍: 0 ⏩: 1
No, I'm not really very familiar with that particular tool... amazingly. Sorry.
👍: 0 ⏩: 1

Thanks for the tutorial, I always found the skin the hardest to do.
👍: 0 ⏩: 1