HOME | DD
 rocketlaunch — Tutorial: Blue-Red Greyscale
Published: 2007-11-05 17:43:59 +0000 UTC; Views: 33039; Favourites: 553; Downloads: 3848
Redirect to original
Description
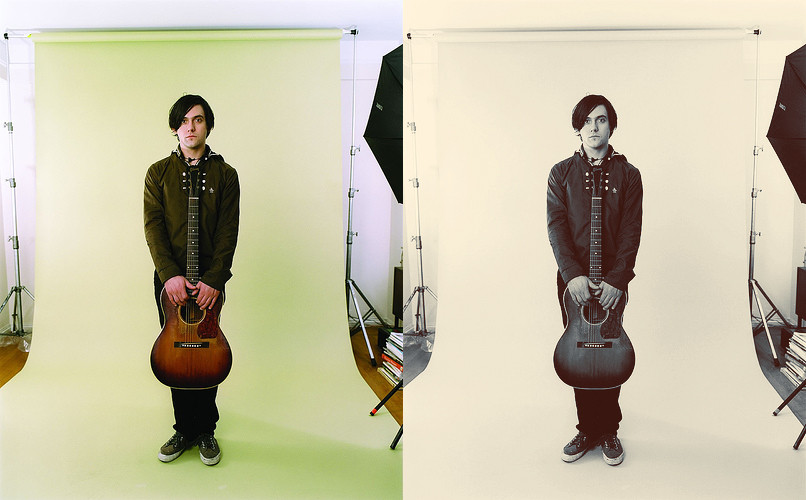
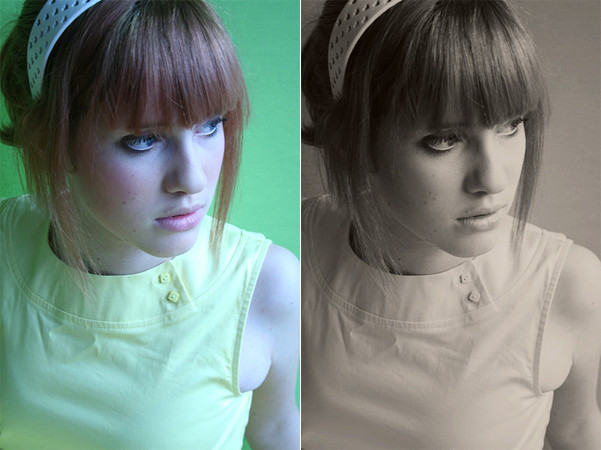
I will be using Photoshop CS2 for this tutorial.TO USE THIS AS AN ACTION, CLICK "DOWNLOAD".
1. Go to image > mode > greyscale, to convert your image to black and white. now go to image > mode > RGB colour, as you'll need to add colours later.
(Don't just desaturate it, it reduces image quality!)
2. Duplicate your background layer and set it to screen at 40%.
3. Go to layer > new fill layer > solid colour, type in #2F466C and click OK. Set that layer to soft light at 100% opcaity.
4. Do the same as above, but type #360D0D in instead. Set that layer to lighten at 100% opacity.
5. Duplicate your background layer again, and drag it to the top. Set it to screen at 50%.
6. Go to layer > new adjustment layer > selective colour, select "relative" and fill this in:
Whites: -14, -8, +33, -6
Blacks: -25, -13, +5, +8
Set this layer to 50% opacity.
7. Go to layer > new fill layer > solid colour, type in #F4DEAA and click OK. Set that layer to multiply at 47% opcaity.
8. Go to layer > new adjustment layer > hue/saturation, select "red" from the drop-down list and set saturation to -30.
9. Go to layer > new adjustment layer > brightness/contrast and fill this in:
Brightness: +2
Contrast: +5
Now merge the layers and you're done!
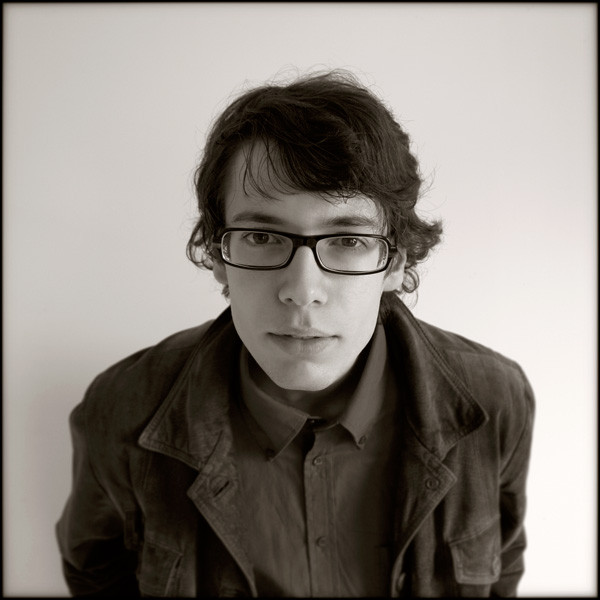
Photo: Conor Oberst, Bright Eyes
Found on the internet (last.fm). All credits go to the photographer. I am not claiming this as my own, I am simply using it for a reference.
Related content


Comments: 31

hey, i really like ur tutorial! but i don't how to do step 6.
can't find "layer > new adjustment layer > selective colour, select "relative""")
👍: 0 ⏩: 0


great work rocketlaunch,
i did it myself, easy, clear & really useful.
thnx,
👍: 0 ⏩: 0


")

 (Smile)")


that's extremely precise!
thanks, i'll keep this in mind next time i'm looking to edit some photos.
👍: 0 ⏩: 0

I've been playing with my photos more. I'll be testing this out.

👍: 0 ⏩: 0

great tutorial. I liked the process and used it myself. I got a bit whimsical with my manip, though. It's posted here
👍: 0 ⏩: 0


Thanks.!
I've been lookin' something like this for a long time.

👍: 0 ⏩: 0


love this. and i also love this picture of conor.
thanks!
👍: 0 ⏩: 0


I do have one.
I'll add it to the tutorial..
👍: 0 ⏩: 1

wow, great news, I'll pay close attention to it

👍: 0 ⏩: 0

Corel paint shop pro? I wish I could make some for those, but I accidently deleted the program last week. I'm still trying to find the disc for it.
If that's what you meant, haha.
")
👍: 0 ⏩: 1

yes, that's what I meant.
hope you'll get it back soon. :/
👍: 0 ⏩: 1
I hope I do too. :/
I should make more PSP tutorials, haha.
👍: 0 ⏩: 0