HOME | DD
 RYE-BREAD —
TUTORIAL TIME
RYE-BREAD —
TUTORIAL TIME

Published: 2010-07-03 00:45:34 +0000 UTC; Views: 43619; Favourites: 1081; Downloads: 979
Redirect to original
Description
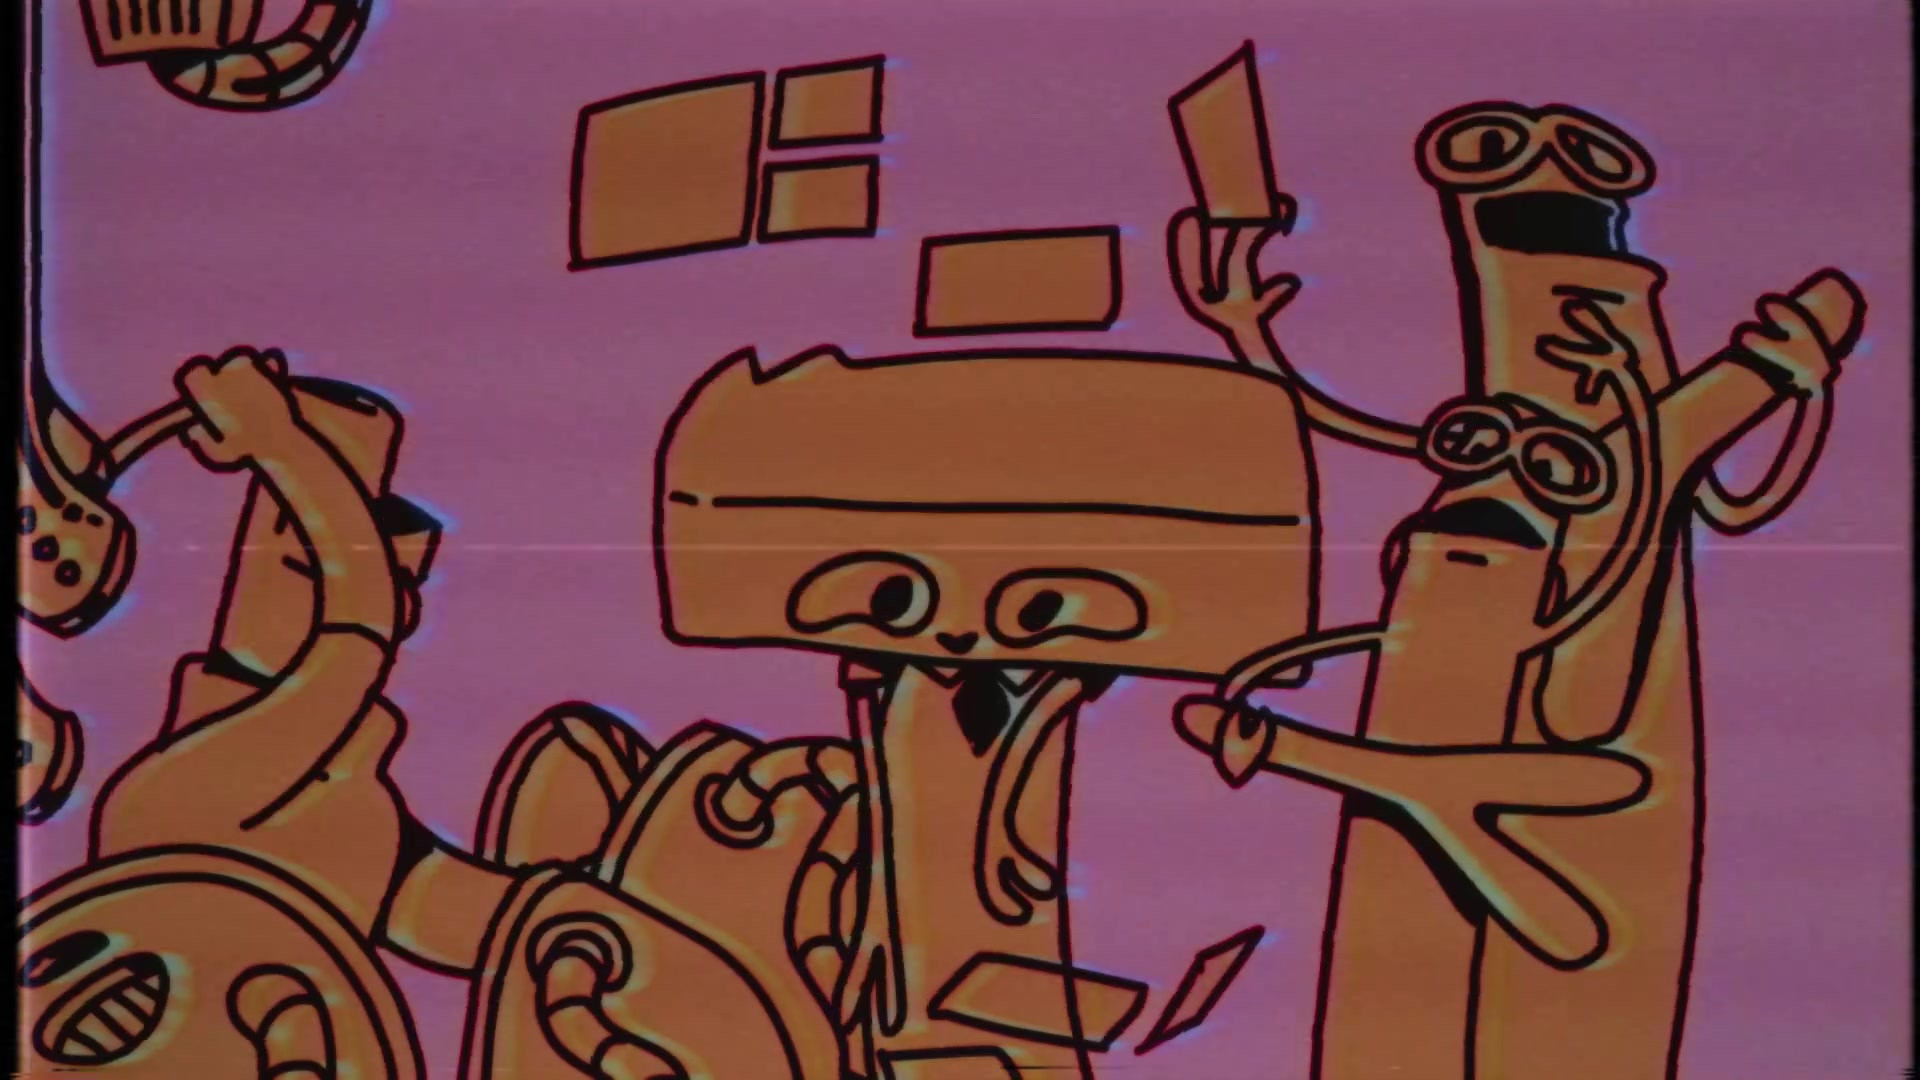
Wanna know how I made Thieves of the Dragon Tomb ? NOW YOU WILL KNOW. Check it out.Things you might need:
•Photoshop CS5
•Autodesk Maya
•Maxwell Render
•Moderate drawing skills
Enjoy!
Related content


Comments: 90

this is so amazing! i really want to try this, but autodesk maya is kinda expensive
do you know any programs similar to it for cheaper/free?
👍: 0 ⏩: 1

autodesk.com/education/free-software/maya you can have tree years license for free just by register
👍: 0 ⏩: 0

Favouriting this just because of sweet mary jane. xD Nice bro.
👍: 0 ⏩: 0

Wait... Did you just recommend Mariujuana for artists?
👍: 0 ⏩: 0

When you apply the Overlay and Hue layers, are you coloring flat colors on overlay, then duplicating it and setting the new layer to hue? Or are you creating two new layers (one overlay and one hue) and coloring on each layer separately to get the colored effects you desire? Are you using overlay for the flat color, or hue?
Thanks!
👍: 0 ⏩: 0

Happy 2011!!1!!1!!
Congratulations on your Daily Deviation!! 
👍: 0 ⏩: 1


cool to see the process, i also like your dancing toast
👍: 0 ⏩: 0


omg i have no idea but i want those rendering programs. id prob fail at it but wow i like that! And i like the idea of having evrything in grayscale before you color it. I mean wow there is so much for me to learn uhh i feel like a noob now lol
👍: 0 ⏩: 0


cool! I'll be learning how to use maya pretty soon... probably next semester! It looks pretty complicated... 
👍: 0 ⏩: 0


Alright checklist: Adobe Photoshop, Autodesk Maya, and Marijuana... I'm ready to start! 8D
👍: 0 ⏩: 0


I just love the way this is written. Screw the epic amounts of detail and incredible usefulness of this whole thing, the writing is beautiful. <3
DD indeed.
👍: 0 ⏩: 0


A nice and in-depth tutorial RYE-BREAD. Luckly, I do have most of those needed items, but could you give me the the details on Maxwell Render?
I'll be downloading and referencing this, no doubt about it! Oh ya, I almost forgot to 
👍: 0 ⏩: 1

thanks, man. glad you enjoyed it. maxwell render is an external rendering plugin for maya, 3ds max, and a few other major 3d packages. it's extremely powerful, yet simple to use (for the most part). i always got really frustrated with mental ray because it was so insanely complicated and never gave good results, but maxwell has it all compacted into a really neat little engine that packs a lot of punch. check it out: [link]
👍: 0 ⏩: 0

Great tutorial! Taking advantage of a 3D program for a 2D picture...YES. Now I have use for Rhino 3D FINALLY! I'll definetely be referring to this for future works hopefully soon!

👍: 0 ⏩: 0


marijuana 
just saying
👍: 0 ⏩: 1
Just revealing my own personal tools of the trade, man ;] I'll trust every artist out there to draw responsibly.
👍: 0 ⏩: 1
yeah I know, makes me want to try
I always hear it really brings out creativity


👍: 0 ⏩: 0


Thank you for this, I've been wanting to try the free student trial of Maya and Max. I've just not had time with school. Now that I'm on break I'm going to give it a whirl.
Great work.
👍: 0 ⏩: 1
Definitely do! It'll really change the way you look at space. Doing something as simple as moving your view camera around your geometry has really affected how I see my compositions while sketching. Should it be from above, below, three-quarter, worm's eye, bird's eye... after a while you can literally move around your illustration's spacial plane in your head and work it out from there.
And then there are the obvious applications like the background in the tutorial, but they're all equally as important.
👍: 0 ⏩: 0

I love that little bit you mentioned about the negative space... a good visual.
👍: 0 ⏩: 1
Hah, to be honest I stole that from one of my professors. Look up Keith Mayerson when you get a chance, he's a super cool dude.
👍: 0 ⏩: 0

Thanks man! Took me all day to realize haha
👍: 0 ⏩: 0

The advice about adding red to the edges of shadows was.... mediocre.
And when I say mediocre I mean FRANTABULOS.
Fanks!
👍: 0 ⏩: 0

Thanks for the tutorial.
Copper pot yes, marijuana not so much.
👍: 0 ⏩: 0


wow, awesome detailed tutorial. You have a great etchnique!
I am new to photoshop, do you paint thegreyscale part like you would have in graphite, by simply using black, white and grey? You know, without creating the document on a greyscale.
👍: 0 ⏩: 1
I actually never convert the document into grayscale and stay in RGB the whole time, but that's really up to you. I use the grayscale slider in photoshop's Color window (Window->Color, then set your preference), as well as the Alt/Option key shortcut for sampling while in brush mode, to accurately choose which gray i'm using. I've also got a tablet to get the values in between through opacity-pressure variations. I don't remember if I mentioned it in the tutorial, but it helps to know that red=50% gray, blue=70, and yellow=20. I map out the potential colors in my head while I'm painting in gray and it really helps.
👍: 0 ⏩: 1
Ah, I see.Thank you very much, you have helped me immensly.And I don't think I have said this before, but your art is great!
👍: 0 ⏩: 0

amazing.  (Smile)")
👍: 0 ⏩: 0

This is an amazing and entertaining tutorial. The way you described how to do backgrounds makes me feel like i could improve in that area by using your tutorial as a reference ^_____^
👍: 0 ⏩: 0

wow wow wow and one more time wow (sad VILenin lol really nice
👍: 0 ⏩: 0


oh so THIS is how you do it. really really amazing to read all this. thanks a lot for such a detailed well walkthrough.
i am not exactly sure how the colouring works though.
so say you have your black art work and now you want to colour it. you create two layers above the grey artwork. why exactly two? also how do you colour it then. do you draw over the whole body of the dragon again and hope it matches OR do you copy the grey dragon art work. turn that copied artwork into just ONE solid/one shape like say turn down the brightness so it just becomes one black shape and then you will colour this shape which is above the grey art work or what exactly do you do.
and how exactly do you colour the outline. is this what the other layer is for?
anyways this is really some epic work!
👍: 0 ⏩: 1
Luckily, it's waaay simpler than that :] Just set your layer blending mode to Overlay and everything you paint on that layer––let's say in this case it's red–– will turn everything below it red while keeping your lights and darks intact. Sort of like how they color old movies.
👍: 0 ⏩: 0

| Next =>