HOME | DD
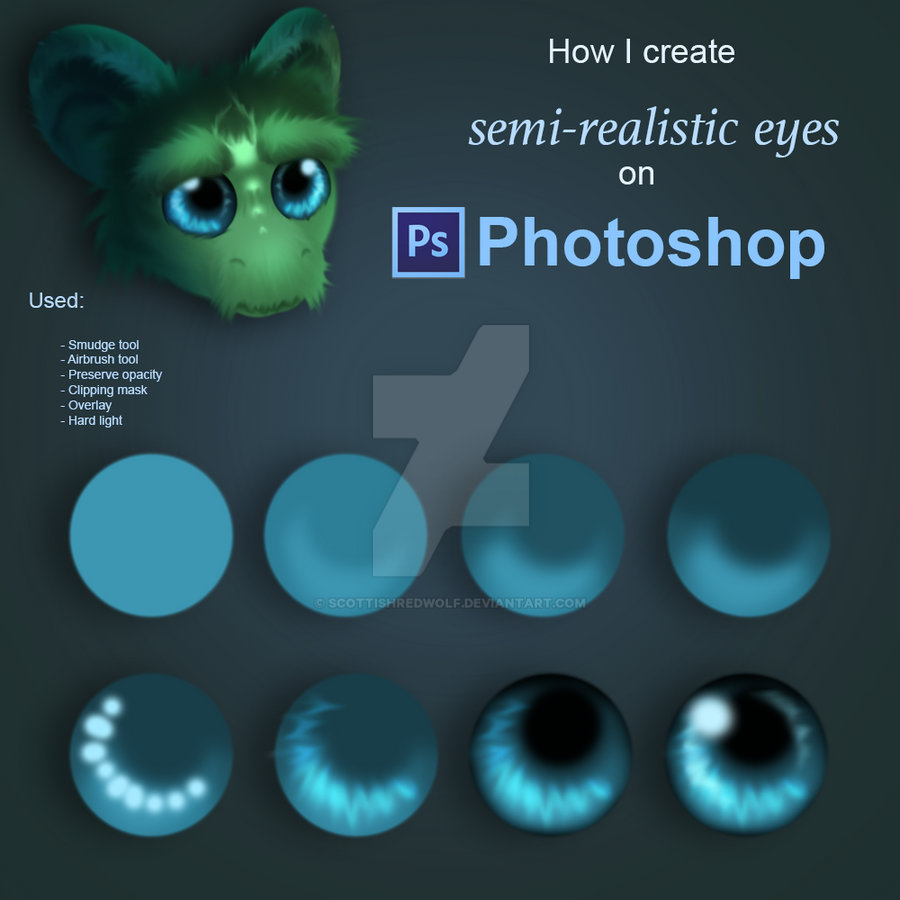
 ScottishRedWolf — How I Create Semi-Realistic Eyes
Published: 2015-12-10 17:59:38 +0000 UTC; Views: 2274; Favourites: 33; Downloads: 0
Redirect to original
Description
Sorry about the watermark o3o;Something I did for my portfolio which was for a (mock) interview I did on Tuesday .u.
I didn't type the steps but since I feel like sharing it, I thought I'd show people how I do it on Photoshop
")
I don't have Photoshop at home but I did this during my study periods~
Please note that I recommend using other tutorials, these are just my own techniques I do.
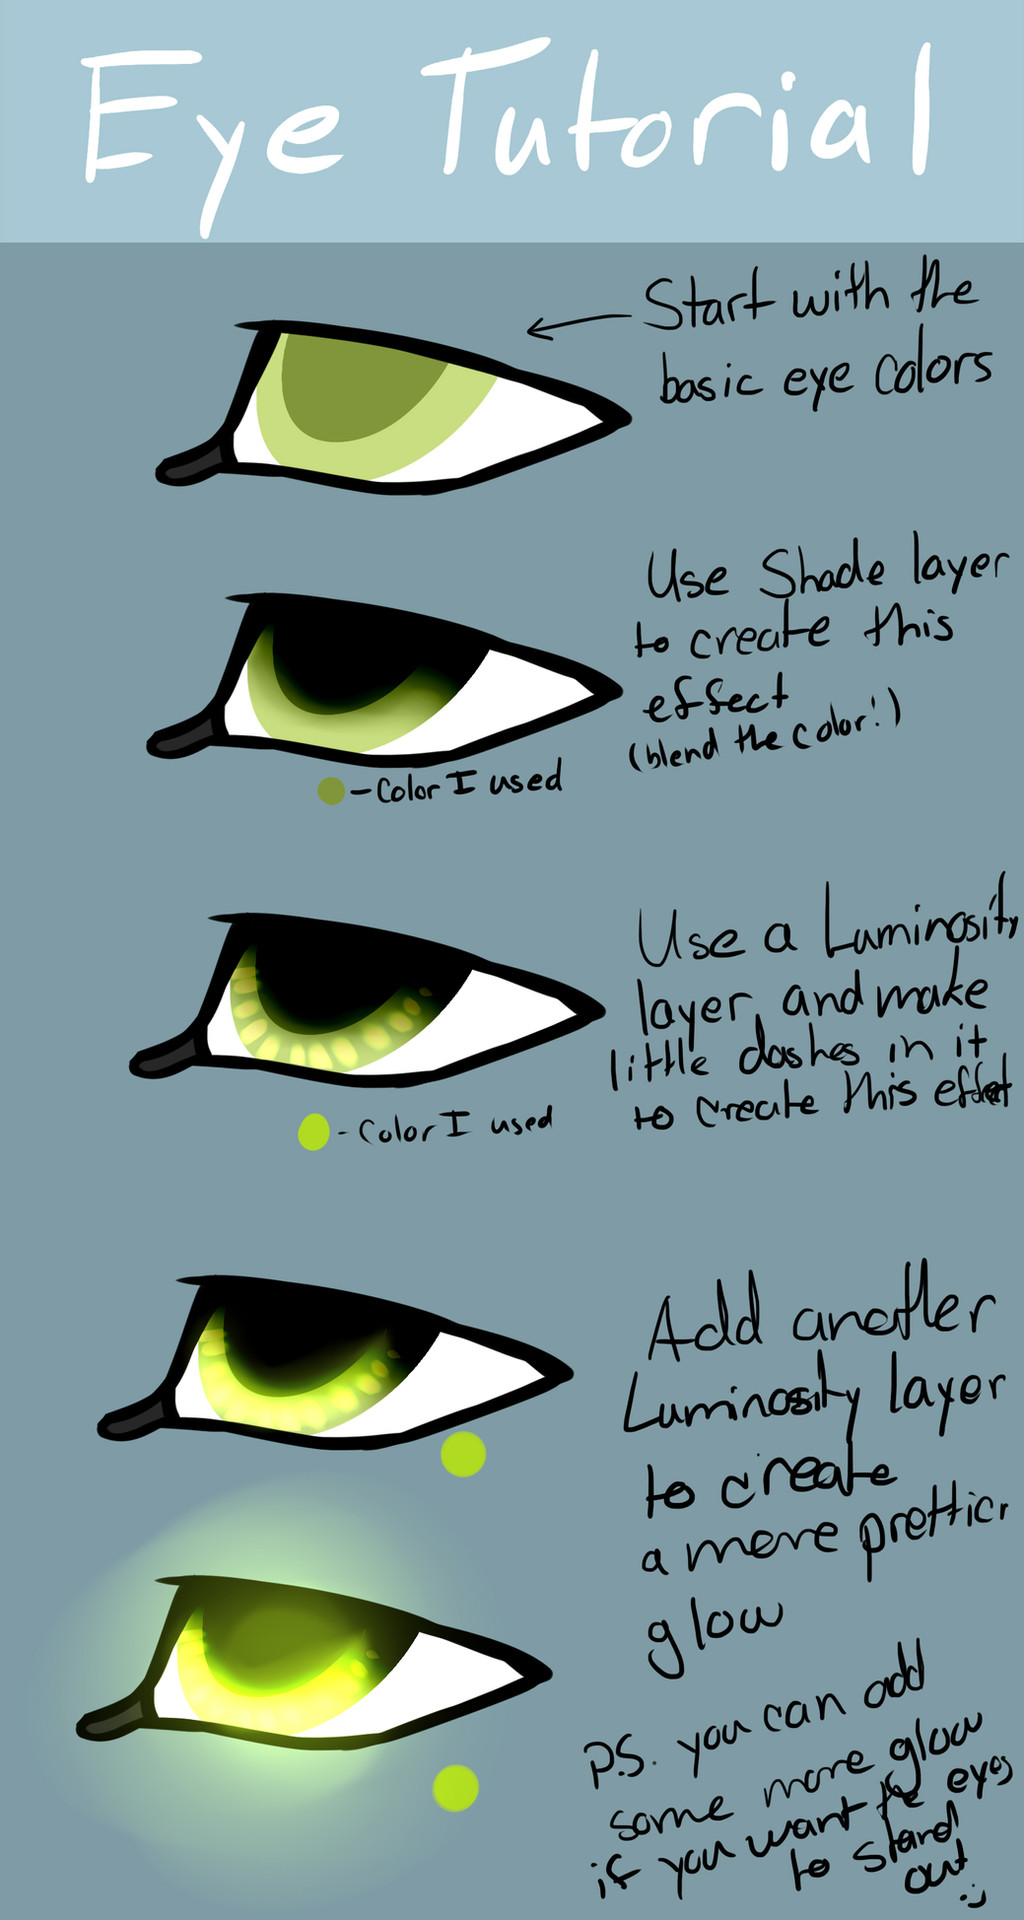
1. Create a circle or whatever shape of eyes the character has.
2. Click on preserve opacity at the corner (it's a little box with squares in it, shown above where your layers are) then start to shade with the airbrush tool. Keep doing different shades until you're happy with the result.
3. Create a new layer and make small blobs around the iris, then use the smudge tool (which looks like a finger) and create a zig zag shape. If you don't see the finger icon then look for the icon that looks like a waterdrop and click at the corner so it shows the options.
4. Once you have made the zigzag shape, click on overlay (where it says normal at the side) and then clipping mask which should be above where opacity at the side is (this makes the zigzag stay in the circle and not outside it, you might see it in my drawing sheet a little at the second bottom left).
5. Make a new layer and do a little more shading along with the pupil then lastly use the airbrush tool to create a shine (optional if you want to use hard light).
Results:
I hope people would find this useful if they want to try out this technique .u. There are other ways to try it, depending what style you're aiming for.
Art (c) Me