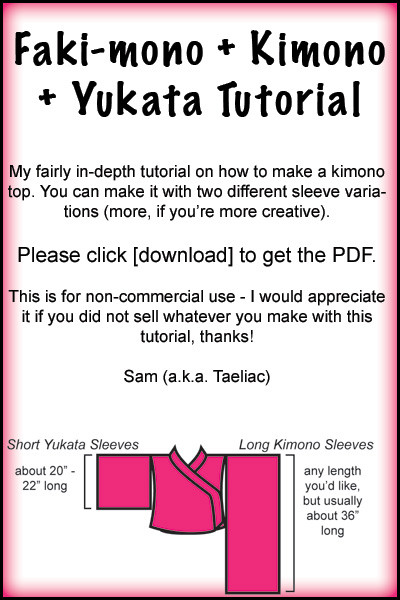
HOME | DD
 taeliac — Tutorial: Simple Bag
by-nc
taeliac — Tutorial: Simple Bag
by-nc

Published: 2010-07-04 03:21:04 +0000 UTC; Views: 22949; Favourites: 237; Downloads: 488
Redirect to original
Description
Download for printable PDF file
Materials & Supplies
- 1 foot [12", 1/3 yard, 30cm] : Canvas fabric
canvas cloth, duck cloth, bottomweight, twill, outdoor canvas, etc - 1 yard [36", 3 feet, 90cm-1m] : 7/8" (2cm) wide ribbon*
gross grain is the best, but any ribbon will do - 2x D-rings : 1" (2.5cm)*
- Matching thread
- Hand sewing needle
- Scissors
- Fabric glue
I prefer the brand "FabriTac" by Beacon, but any sort of fabric glue will work. Super glue, or white glue, will not work, though. Hot glue is use at your own risk, and don't be disappointed with the results
* be sure that your d-rings and ribbon are similar widths. If you want to use 2" (5cm) wide ribbon for your strap, be sure to buy at least 2" (5cm) wide d-rings so the ribbon fits~
Cut your fabric
The amount of fabric for your bag will actually make two bags (assuming you're using a 60" wide (~150cm wide) fabric)!! You just have to cut the fabric apart along the fold that it's in, and you're pretty much set!
Huzzah, right? One for you, one for a friend, maybe?
And, if you're not, at least you'll have some scraps left over to mess with for another project. So, cut your rectangle of fabric about 12" (30cm) wide by 30" (~75cm) long.
Anywho, this one strip of fabric will be folded up to create the front, the back, and the flap of the bag, all in one.
Measure your fabric rectangle up 12" (30cm) from the bottom, and mark it with a lightly drawn pencil line. Now, measure another 12" (30cm) up from there, and mark another line.
Look at the diagram on the instruction image, that should help you understand how it all works!
Now, lets get on to sewing…
Step #1: Finish this edge
I know, it seems weird doing this first, right? Well, trust me - it will save you much trouble in the future!
Use a running stitch, and turn this very edge over, like the picture shows. Be sure to press it out, too, just to be sure it looks nice. Remember to try to keep your hand sewing stitches even and straight, just because it will look prettier that way.
Step #2 : Side seams
Now, fold up the bag along the first line you drew, with the right sides of the fabric together (i.e. the sides of the fabric without the pencil markings on it).
Use a backstitch to sew up the sides of the bag. A backstitch will give a stronger hold than a running stitch, and the smaller they are (like, around 1/2" (12mm) long) the more secure they'll be, and the longer the bag will last.
* If you want to be really fancy about it, do a whip stitch along the outside after you're done sewing up the sides, to give it even more security and to keep it from fraying as easily.
Step #3 : Turn & trim
Turn the bag right-side out. You're over half way done already, isn't that awesome?
Now, take a look at the flap at the top. Take a nip out of right where the top of the bag ends and the flap begins - this helps to take the strain off of the flap, and keeps things nice and straight (especially if you got a little wodgy in your sewing).
Step #4 : Finish those edges
Now, fold up the raw edges of the flap, and sew them down using a running stitch. This is just like what you did in step #1, and creates a nice, finished look for the bag.
Now is also a really, really good time to press it all.
Did you catch that? press the bag out. It will look soooooo much better!
You're done with the bag part! Hooray!! Now is a good time to decorate it, too (there are templates here for you to print up and use for designing ideas before you actually dig into the fabric.
Decorate away!!
Decorating this bag is a wonderful way to use up scraps of fabric you may have laying around from other projects, or things you've pilfered from friends or family.
You can even just take sharpies and draw right on the bag, if you'd want (you may want to put a couple of sheets of paper inside of the bag to keep it from bleeding through, though)…
Have fun, there isn't a way to mess up, and enjoy yourself!
- - - - - - - - - - - - - - - - - - - - -
Now, it is time to put the handle on the bag, to make it easier to carry around. It's pretty boring without it, at least.
Handle: Step #5 : Cut the ribbon
Of your yard (90cm - 1m) of ribbon, cut off two pieces about 4" (10cm) long. Set the rest aside for the moment.
Handle: Step #6 : Put the d-ring in
… that's what she said
Sorry, it had to be said. Anywho, take one of the pieces of ribbon and fold it in half around the straight part of the d-ring. You may want to glue the ribbon closed at this point.
Do that with the other ribbon and d-ring.
Handle: Step #7 : Place them & stitch them
Place both of the ribbon loop thingers on the back of the bag, as shown, in both corners, towards the top.
Glue them down, and then hand sew them down, doing both a backstitch in an X shape (as shown) as well as along the edge, with an applique stitch, if you really want them to stay in place.
Remember, this is going to take the most strain out of all of the bag, so really nail those suckers down.
A tip, though - be sure you're not sewing through your front, or your flap, otherwise, the bag won't function as a bag, and that would be sad.
FINISH!
Okay, so there is a step I've not pictured, sorry! All you do is take the rest of your ribbon and loop it through the d-rings (like step #6) on both sides, creating the strap.
You can either glue it down like in step #6, sew them like in step #7, or you can just tie the ribbon in place on either side.
Ta-da! You're finished!
See, not so bad at all, eh? Should take you an afternoon or two, depending on how crazy your decorating goes

- - - - - - - - - - - - - - - - - - - - -
Made from this tutorial…
((no one has made anything from this tutorial… yet. Let me know if you do, so I can link to it!))
I'll have pictures of my personal bag shortly (after the camp that I'm teaching this next week is done, where we're doing this and a few more projects) but for now, I hope that this gives you a good idea on how to make a very simple bag out of scraps and some hand-sewing know-how!
Also, did I ever mention how much I <3 Illustrator? I'm starting to feel like I should have been a technical illustrator, and not a sewing person... alas XP
Please, please let me know if you use this tutorial - I'd absolutely love to see what you create with it! Please link back to the tutorial here on dA, too, so others can try it!
Also, please do not redistribute, edit, repost, or claim as your own. Also, this tutorial is for non-commercial use only (this means you cannot make these things and sell them)
This took me hours to put together, and I share tutorials because I love doing so. I love sharing my vast sewing knowledge with others, in the hopes that someone else will find that they love creating things with their own hands. If I find people stealing these, claiming they are their own, or selling things made this way, I'm going to be very, very angsty. And probably freak out at the person, too.
Anywho, I hope you like this quick and easy tutorial!

©2010 Sam Lemieux (`taeliac ) \\ BeAnime.com \\ Taeliac.Etsy.com
Related content


Comments: 11

Your instructions are great. Perfectly understandable for kids and illustrated in a clean, organized and very easy to follow way.
 (Smile)")
👍: 0 ⏩: 0

Thank you. My son wanted to make a simple bag for his day crap but he wanted to make it. I have been looking for an easy to get pattern, and oh look here one is. Again thank you.
👍: 0 ⏩: 0

Thanks so much for doing this! ")
👍: 0 ⏩: 1

You should try this, then - it's very easy, and super easy to adapt to just about any type of bag with a little bit of tweaking
👍: 0 ⏩: 1


I need a new bag. This is absolutely perfect. I also want to learn to sew (I've been saying this for years) because my boyfriend agreed to do a cosplay with me, and I look just like Haruhi. It's gunne be tough, but I think it can be done. I'll start with this, I suppose, so I don't bite off more than I can chew.
👍: 0 ⏩: 1
You should definitely try it! This is how we taught all the students in our camp last week the basics of sewing, and they created some amazing things by hand (skirts, tops, jewelry, etc) in just a few days
It is fun, easy, and, hey, a great way to make a gift for someone while still practicing!
👍: 0 ⏩: 0

Holy moley, hun, I love it!! Our class is going to go so well, thank you very much for taking the time to do this.
👍: 0 ⏩: 1
I certainly hope so!!
You know I only do good on presentations and the like if I'm over-prepared for them 
Plus, I get to practice with Illustrator more, which is always fun (and, getting to be faster and faster with this stuffs!)

👍: 0 ⏩: 1
You're awesome, both in general and definitely with illustrator.
👍: 0 ⏩: 0