HOME | DD
 torstan — How to draw quick trees
Published: 2012-02-15 19:22:30 +0000 UTC; Views: 41346; Favourites: 547; Downloads: 2080
Redirect to original
Description
How to colour quick trees for RPG maps+Anthony Metcalf asked about colouring up trees for RPG maps. Today I'm walking through my method for that. This follows on from this mini-tute/discussion on different tree styles from last week: [link]
I'm working with style 1 from that tutorial here, though it can be directly applied to the other styles just as easily.
The problem with trees is the leaves. You can't just draw a green sphere and call it a tree, because we know trees are detailed objects with lots of leaves. Equally you can't draw every leaf as it'll drive you crazy, and your players won't appreciate it. So the trick is to give the impression of detail without painting every single leaf. This is where custom brushes come in. On Monday I covered how to create a grungy custom brush: [link]
With this brush, we now jump into the tree itself.
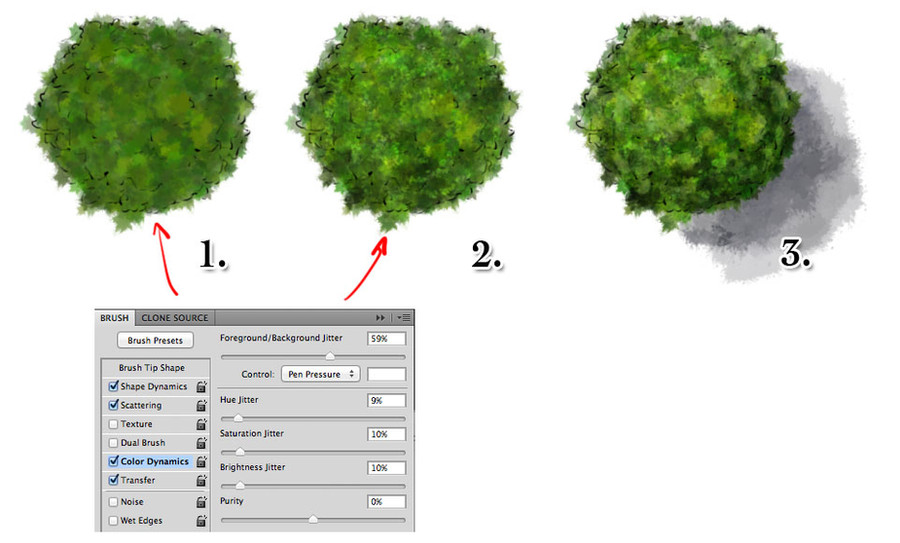
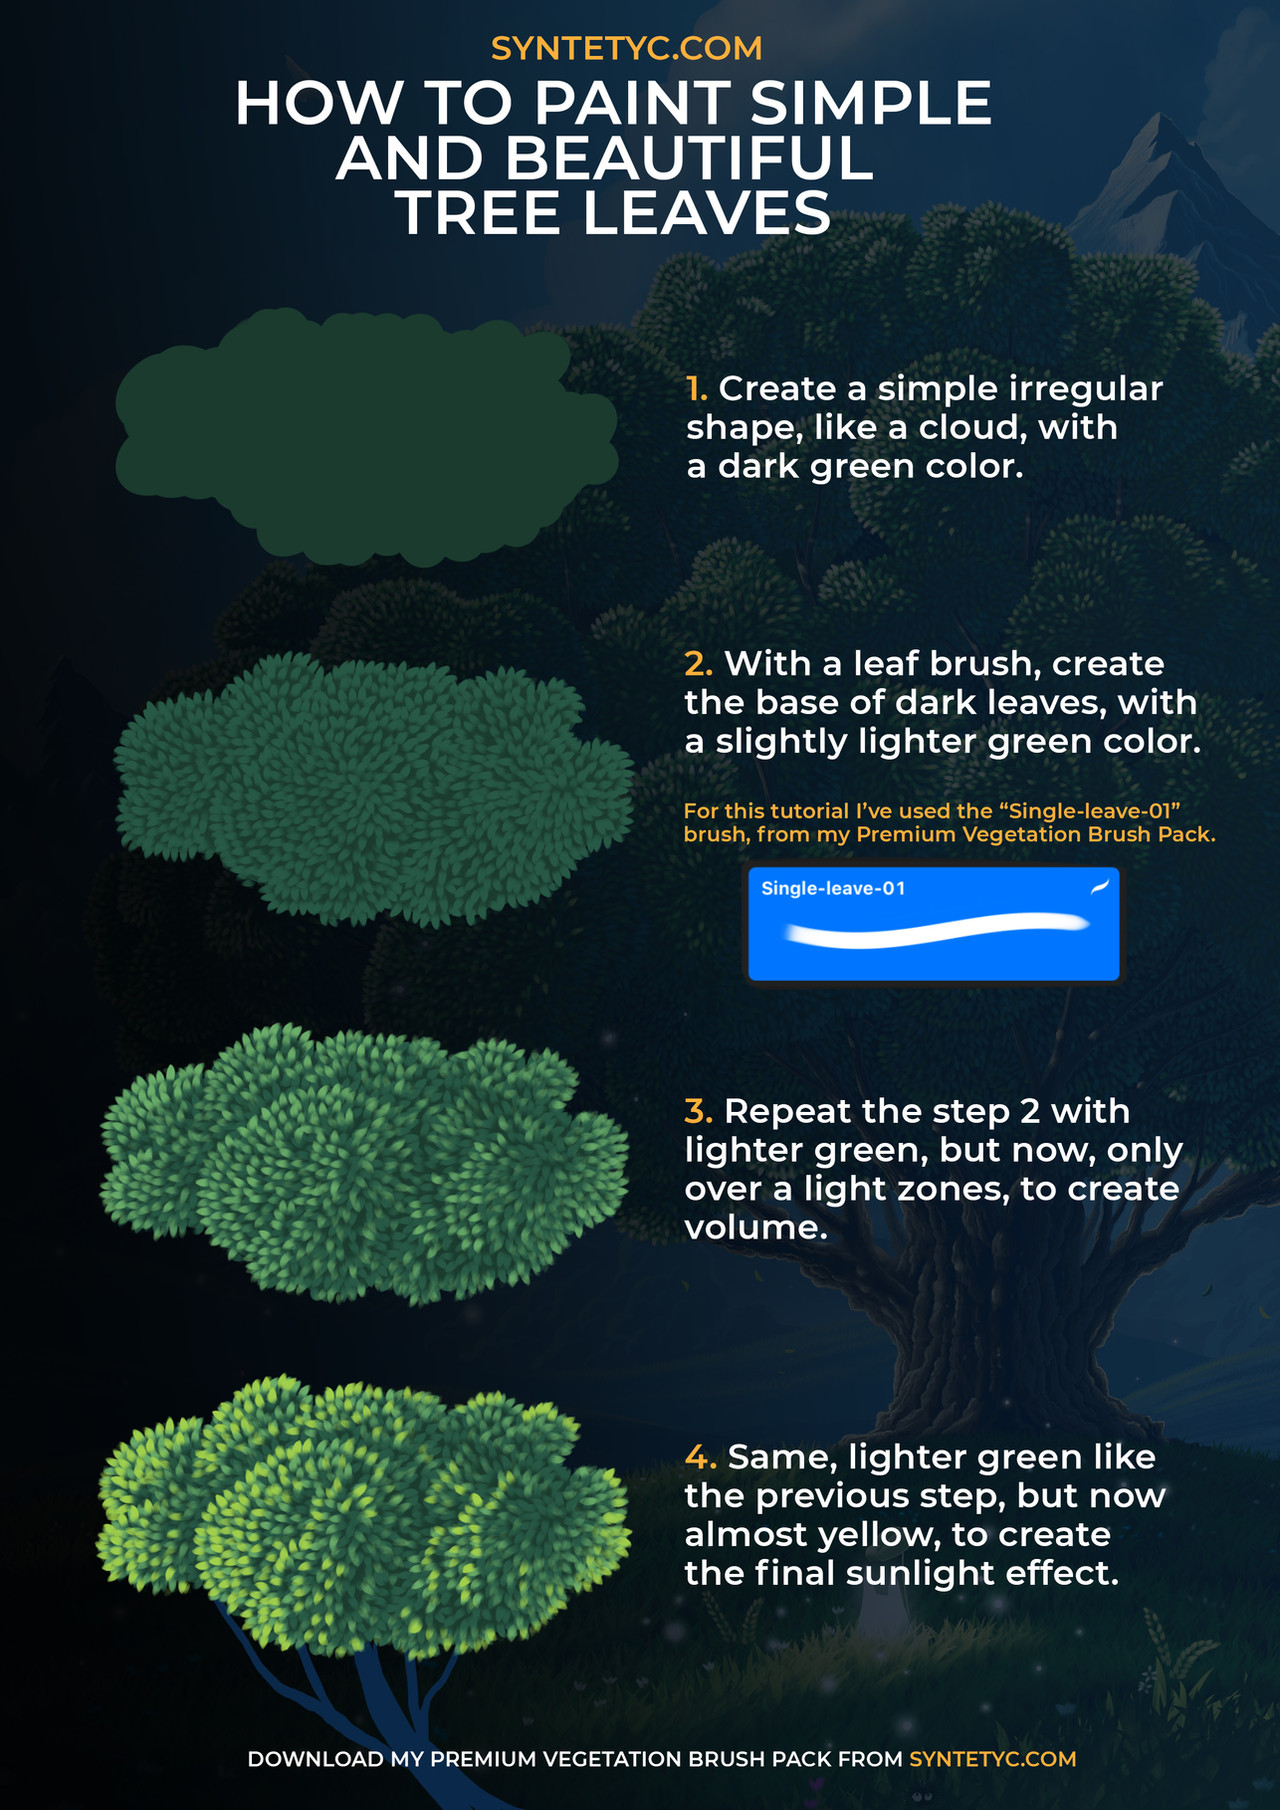
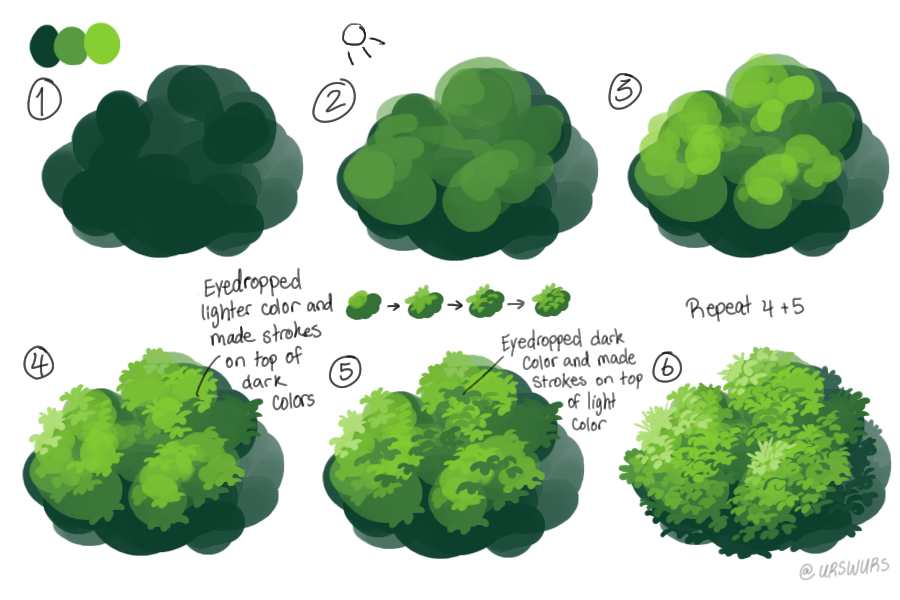
1. Pick two colours, different shades of green for a summer tree, different shades of orange/red for an autumn tree. In Brush Dynamics, set Color Dynamics to jitter the foreground/background colour, and also add in some random variation on each of the hue/saturation/brightness values. Also add in some scatter. Now use this brush to paint in a colour layer as a base for your tree. The colour jitter means that you never paint with the same colour twice. The scattering means your brush layes down lots of independent overlapping jittery patterns.
2. Now we'll give the impression of leaves, and some general shape and form. Add an overlay layer, pick a dark blue for the shadows and a light yellow/white for the highlights. I'm keeping the scatter, and the jitter on the brush here. As the colour jitter is only 50% foreground/background it means it'll lay down more of the foreground colour than the background. So with the foreground set to the dark blue (and the background set to light yellow) I lay in large low opacity shaps around the shadowed regions. Build them up slowly and see what the tree starts to look like. When I'm happy with that, I switch the colours round (x on the keyboard for speed), reduce the brush size and increase the opacity to about 60%. Then I work in scattered highlights that give the impression of leaves.
3. The last step is to really sell the shape of the tree. Add a soft light layer. Turn off the colour jitter and use the same bright yellow (almost white) with a low opacity to highlight the top of the tree. Switch colours to your shadow hue (dark blue) and build up the tree shadows. Try to follow any contours of the line drawing. Trees aren't just great masses of leaves - they clump and bunch and have shapes inside the groups of leaves. When you're happy with this, add a multiply layer underneath the other layers and use a low opacity brush with your shadow he and lay in a cast shadow to bring the tree out of the background.
That's it! It's pretty quick, even for lots of trees. If you're doing a lot of trees, make sure you change colours a little for each one, and give them a wide range of sizes to avoid them looking like cookie cutter copies.
If you'd like to use this tree, the psd file is here:
[link]
And you can find a png with and without cast shadow here:
[link]
[link]
These pngs are CC-BY-NC-SA - so feel free to use these for any non-commercial project.
As ever, feel free to share this if you find it useful. You can find older tutorials by searching for #fmtips or on the tutorials section of my blog: [link]
#fmtips #map #rpg #photoshop
Related content


Comments: 15


 (Smile)")


")

Thanks for this tutorial especially the shadow effects!!
👍: 0 ⏩: 0


Awesome tut, thanks a lot >w👍: 0 ⏩: 0

Your tutorials are succinct, effective, and very easy to follow. This and your previous grunge brush tutorial were incredibly helpful. Thank you!
👍: 0 ⏩: 1

I'm really glad to hear it! I always wonder how easy they are to follow when I'm writing them, because it's hard to predict what things will turn out to be tricky. Glad they're working for you.
👍: 0 ⏩: 0

