HOME | DD
 Ahyicodae — Tutorial: Dragon Head
Published: 2008-02-16 01:52:02 +0000 UTC; Views: 25779; Favourites: 278; Downloads: 491
Redirect to original
Description
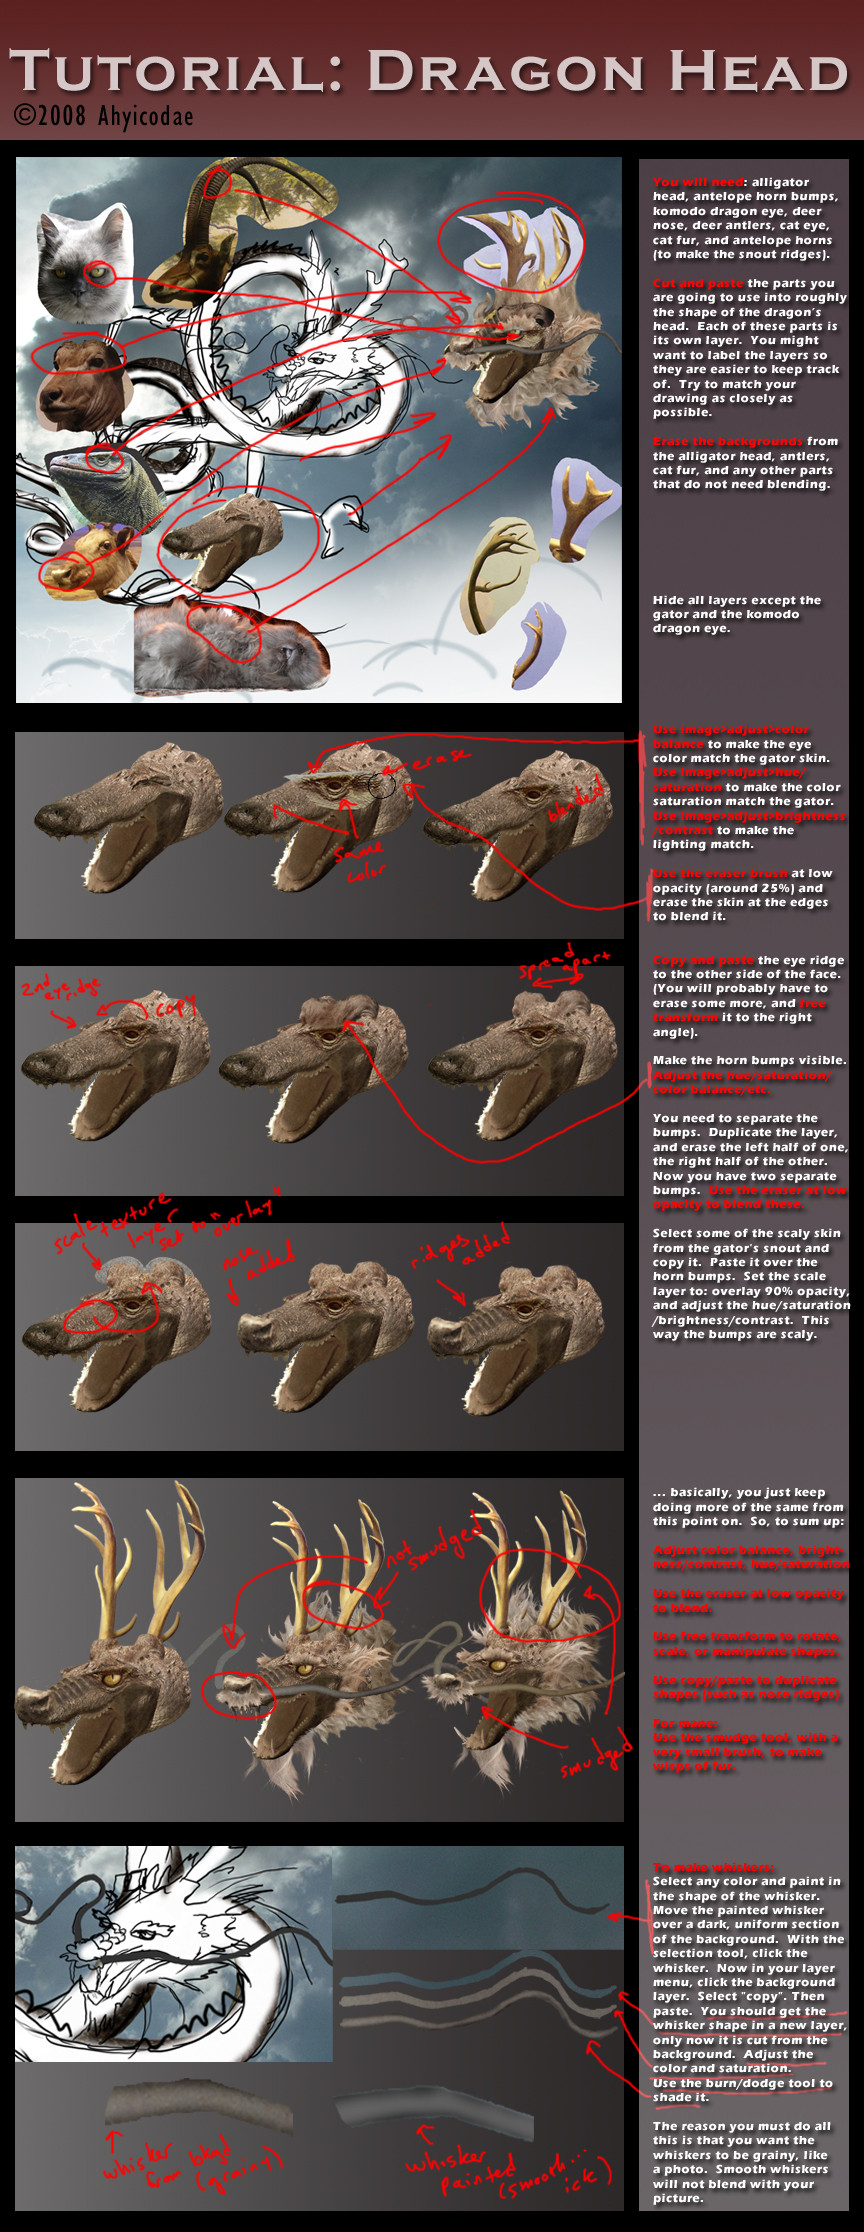
I get lots of questions about photomanipulation. Mostly, "how do you do that?" Well, now my most secret techniques will be yours! In painstaking detail.The truth is, photomanipulating a dragon takes me about 30 hrs., and it's fairly complicated and messy. For this tutorial to be useful to you, some basic familiarity with Photoshop is a MUST.
This is the head detail. The main dragon tutorial can be found here: [link]
Once you have a dragon, the tutorial on lighting and coloring can be found here: [link]
Related content


Comments: 30

Extremely helpful!! ")
👍: 0 ⏩: 0

Hahah, This looks pretty funny. Great work using al those part from different animals
👍: 0 ⏩: 0

Nice! Whole tutorial helped me a lot, especially I've learned how to make the shading right.
About the whiskers, I've found another way to make them grainy, there is no need to cut/copy pixels from the background.
After you draw and shade the whiskers, lock empty/transparent pixels (that square icon in layers window), then go to Filter -> Noise -> Add noise and play with noise strength to make the whiskers fit the image.  (Smile)")
Of course it works with other parts, such as fur drawn from the start.
👍: 0 ⏩: 0


I think its valuable t o add that once finished one can stand back and Re-draw tor Draw the final result to give it the traditional feel and unify the end result, but of course it all depends on the desired end result, i mean Me i would have to translate this into a tattoo-able image at the end no matter what.... some times thats just done by tattooing it but its not for beginners cuz if you dont simplify it first one tends to try to throw in tooooo much detail and that just ruins it...
ok , im done... cheers -b
👍: 0 ⏩: 0


Thank you for this ^.~ But, do you HAVE to use photoshop, or is GIMP and option? I don't have photoshop, because I can't seem to find it, and all I have is GIMP.
👍: 0 ⏩: 1

Well, I haven't used GIMP, so I don't really know!
👍: 0 ⏩: 1
Alright, thanks! GIMP does have the same tools, but I've always preferred photoshop. It is nicer.
👍: 0 ⏩: 0


You're genius !
That is a very very nice manipulate!
I can't expect that will happen !
👍: 0 ⏩: 1
Thank you! Glad you found it helpful.
👍: 0 ⏩: 1
It is useful. I learnt from it!
Thanks!
👍: 0 ⏩: 0


")


Lovely tutorial, very helpful and detailed, with excellent results! ^^ I'll have to try this some time.
👍: 0 ⏩: 1