HOME | DD
 Ahyicodae — Tutorial: Lighting and Color

Published: 2008-02-17 01:54:02 +0000 UTC; Views: 31570; Favourites: 357; Downloads: 560
Redirect to original
Description
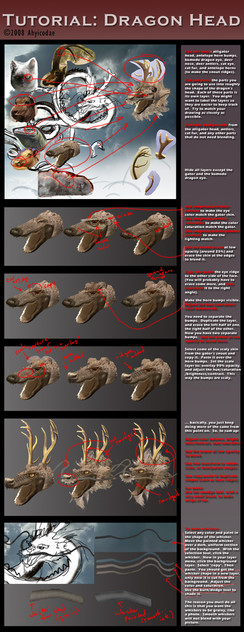
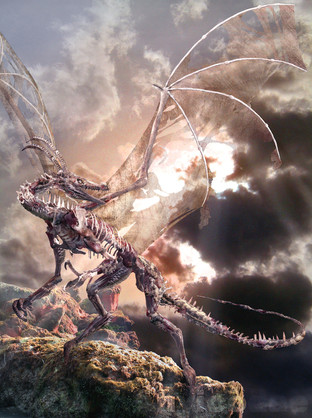
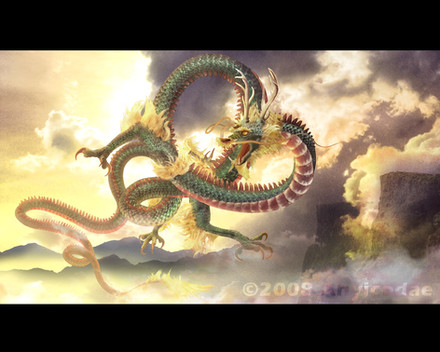
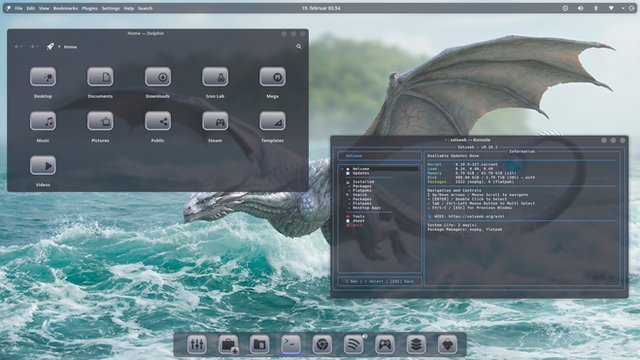
Final part of the Dragon Tutorial. The other sections are Part I: Dragon Collage and Part II: Dragon Head .Even though the collage part of photomanipulation is about 80% of the work, it's that final 20% that really makes the picture.
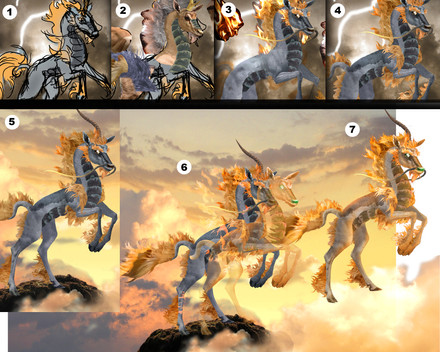
A lot of this section will rely on your instincts as an artist. Painters will find this part comes fairly naturally; in oils, acrylics, watercolor, etc., artists are trained to mix and match colors in all kinds of ways. If you don't have an art background, you may struggle to make things look "right." Don't give up. But maybe take some classes in traditional art to give you a feel for it, because mucking around with lighting and color is a lot like painting.
Thanks to *pricecw-stock for the snake stock!
(Oh, and for those who wonder, yes the background is different from the one in the earlier tutorials. That was just a placeholder background. This new background was made specifically for this dragon. Someday I'll do a tutorial on backgrounds, but they are boring... and you can get nice ones from friendly stock artists anyway.


 )
)
Related content
Comments: 47

Ashtonishing, i never thought of the lightning adjustments in that way, duplicating and such, it makes it look so pretty.
👍: 0 ⏩: 0

wow, I've never seen a photomanipulated picture done so thoroughly, it looks amazing. And extremely realistic, you cannot see the animals mixed to make it without the help of your tutorial, most pictures you can see them well.
👍: 0 ⏩: 0

thanks a lot for taking the time to make this set of tutorials!
👍: 0 ⏩: 0

I really hope this will help me if/when I get photoshop.. Hope to be able to make digital art in other programs than paint and DA muro O_o
👍: 0 ⏩: 0

Amazing tutorial. I'll have to try it sometime
👍: 0 ⏩: 0

FABULOUS!!! I had NO idea you could do that! thank you very very much!
👍: 0 ⏩: 0

hah, never see this type of style used to make dragons, top stuff, this is very good. Nice work!
👍: 0 ⏩: 0

amazing! how much time did you spend on this picture?
👍: 0 ⏩: 0

The two other layers for shading really helped; I never would have thought of that! Thanks!
👍: 0 ⏩: 0

Thanks for the tutorial. I like the way you explained things, it was very easy to follow & learn from. 
👍: 0 ⏩: 1

Glad to hear it! 
👍: 0 ⏩: 0

I'm so glad to hear it! 
👍: 0 ⏩: 0

hey man thanks for these tuts you did...and the finished piece is absolutely beautiful...
👍: 0 ⏩: 1

No prob. 
👍: 0 ⏩: 1

i wish i had the patience to do this kind of stuff.
👍: 0 ⏩: 0

This is very useful and well-done!
And kind of addicting, now...haha.
👍: 0 ⏩: 1

ooh neat, I always have trouble blending foreground and background colours (esp the shadows). This is a cool idea with making 2 layers for shading and highlighting and blend, thanks
👍: 0 ⏩: 1

No problem! I hope it is helpful.
👍: 0 ⏩: 0

thats awesome!! Just a question, there is a line in the mouth, was a tongue supposed to be there or is that just... a line..
well anyway, this dragon rocks!
👍: 0 ⏩: 1

I think the line you are referring to is the alligator's tongue (from the original alligator head photograph). The shadow of it or something. I didn't mess with the inside of the mouth, so whatever it is, it was there originally in the alligator.
👍: 0 ⏩: 1

haha okay. just thought it was strange there was a line in his mouth
👍: 0 ⏩: 1

"Her" mouth.
And yeah, I can see how that line looks strange. Never noticed it until you pointed it out. The alligator's tongue is very... flat.
👍: 0 ⏩: 0

Great Technique...I think your tutorial is really helpful for people like me who are totally clueless when it comes to photomanipulations..thanks for sharing
👍: 0 ⏩: 0

How do you get the clouds in the first place? and for the layers won't the shadow bit obscure the green and the light layer?
👍: 0 ⏩: 1

The shadow layer is underneath the green and the light layer. Since it is the bottom layer, only the parts of the layers above that you erase will reveal it.
For the clouds you need to find some good stock photographs. I usually play with layers a lot, overlapping different cloud images and using "overlay," "screen," and "luminosity" or "color."
👍: 0 ⏩: 1

the layer duplication of the shadows n highlights is a great way to blend the pic with the background. ill keep this in mind, thanks!
👍: 0 ⏩: 0

I'm still in awe of this...
I'd probably never have the patience to do that xDD
But it looks friggin awesome!
👍: 0 ⏩: 1

Thank you!
It takes a lot of patience to photomanipulate a dragon, but not so much to make other creatures. But then again, it also takes a lot of patience to *paint* a dragon (all those scales)... I've done both. I honestly can't say which is more time-consuming.
👍: 0 ⏩: 1

Oi >.< I've done multiple dragons in watercolor and colored pencil and whatnot...
-dies-
It's just GRR while you're doing it. But really, if you force yourself to be VERY patient and do your very best no matter what. Then it turns out really good in the end.
But honestly, I was surprised it turned out that good. I looked at the first tutorial and I was like... no way, and then next NO WAI and then HOLY CRAP. Seriously, that's talent to photomanipulate that xDD
👍: 0 ⏩: 1

Thank you so much!
Actually, NO WAI is what I say to myself a lot working on these things. Usually something along the lines of, "NO WAI will this thing ever look like anything but crap!!!" 
You're right about the patience. Even when it looks bad, you just have to keep working away at it... this one was the opposite of the usual though. It looked good right up until the end, when I printed it. Then it looked terrible! And I spent half a day printing it until the colors came out right. GRRRR. St00pid monitor! My colors are all off. T_T
👍: 0 ⏩: 1

xD Yeah that happens a lot with my traditional work. I simply hate it until I can see things coming together (finally) and then it looks good ^^
It's hard to keep on working tho 

And I still think it looks great
👍: 0 ⏩: 0

I love this series of tutorials, it's really informative and helpful (: I've learnt a lot, especially about blending and all the fiddly little stuff. Thanks so much!
👍: 0 ⏩: 1

I'm so glad to hear that! 
👍: 0 ⏩: 0

