HOME | DD
 Kyttias — SAI Tutorial - How I Shade in Four Steps
#guide #sai #shading #tutorial #painttoolsai
Published: 2015-12-15 10:35:11 +0000 UTC; Views: 24876; Favourites: 226; Downloads: 116
Redirect to original
Description
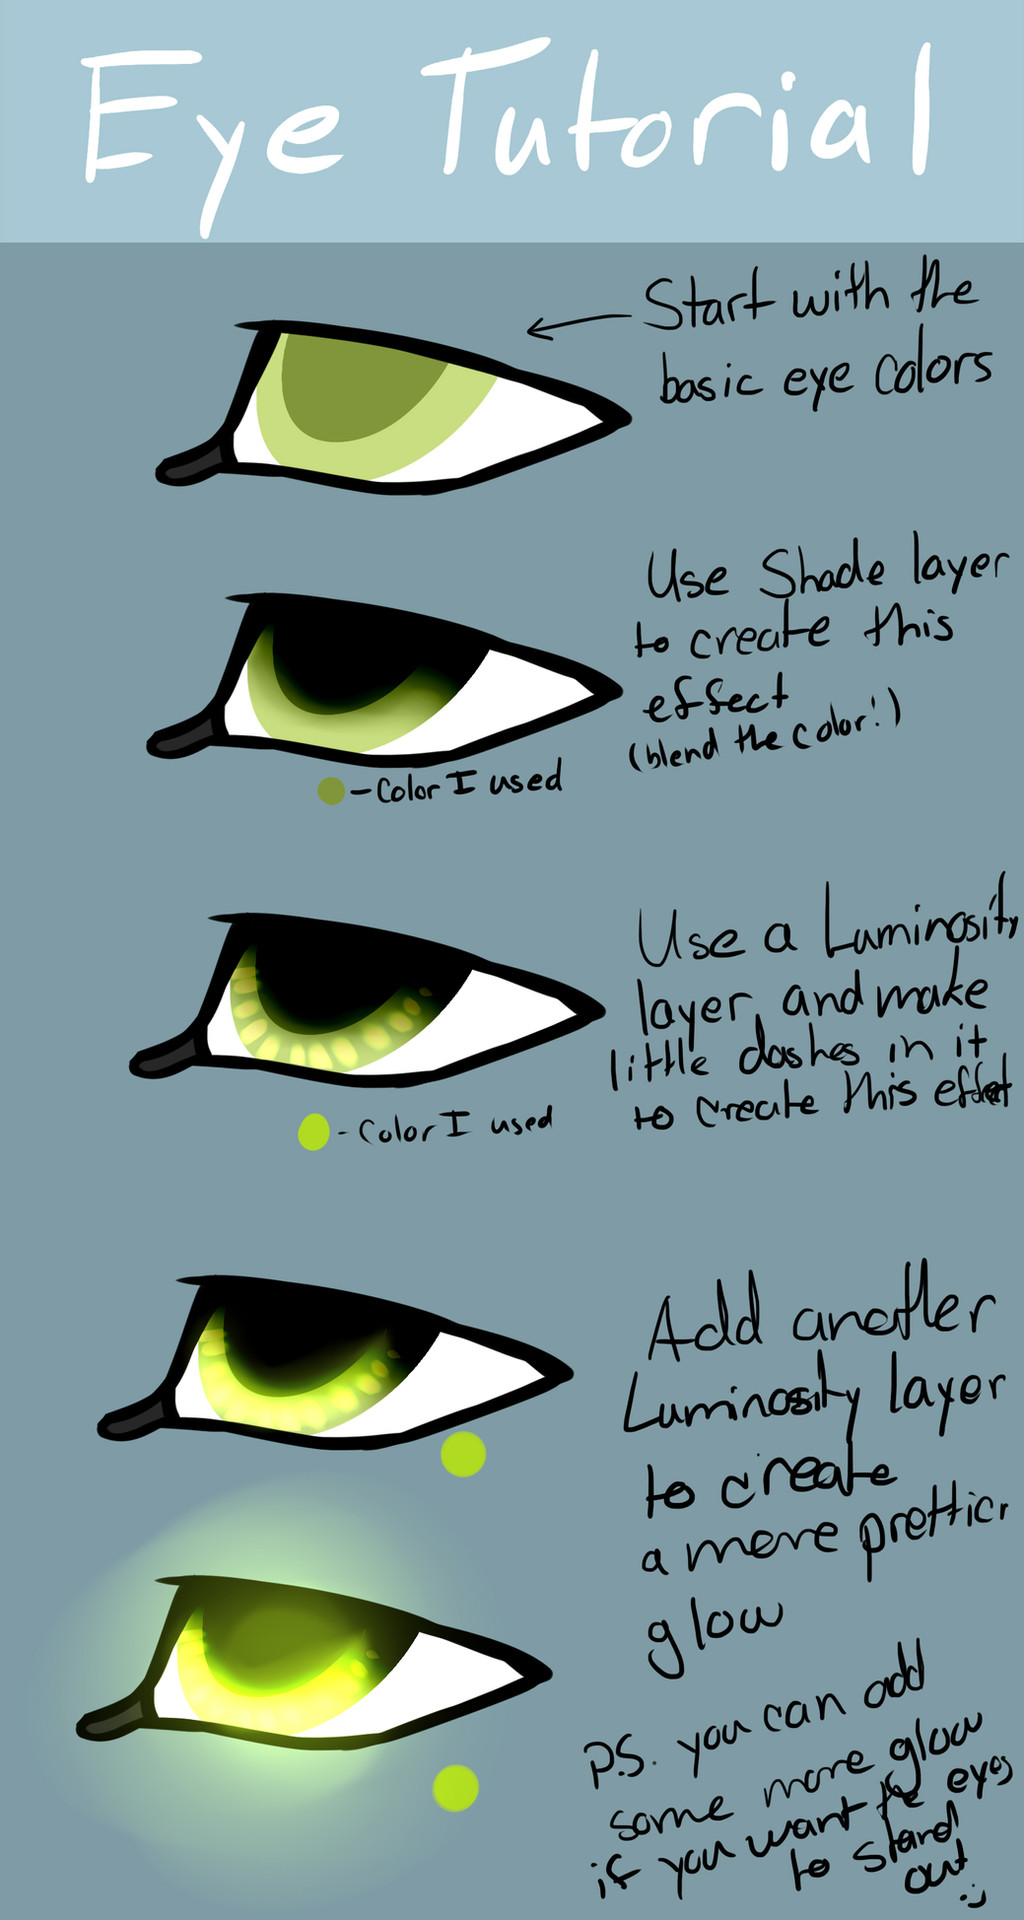
Try shading more than once, in more than one color, blurring out one but leaving the other crisp.That's kind of cool but I didn't mention it.
Below is a transcript of the above.
-
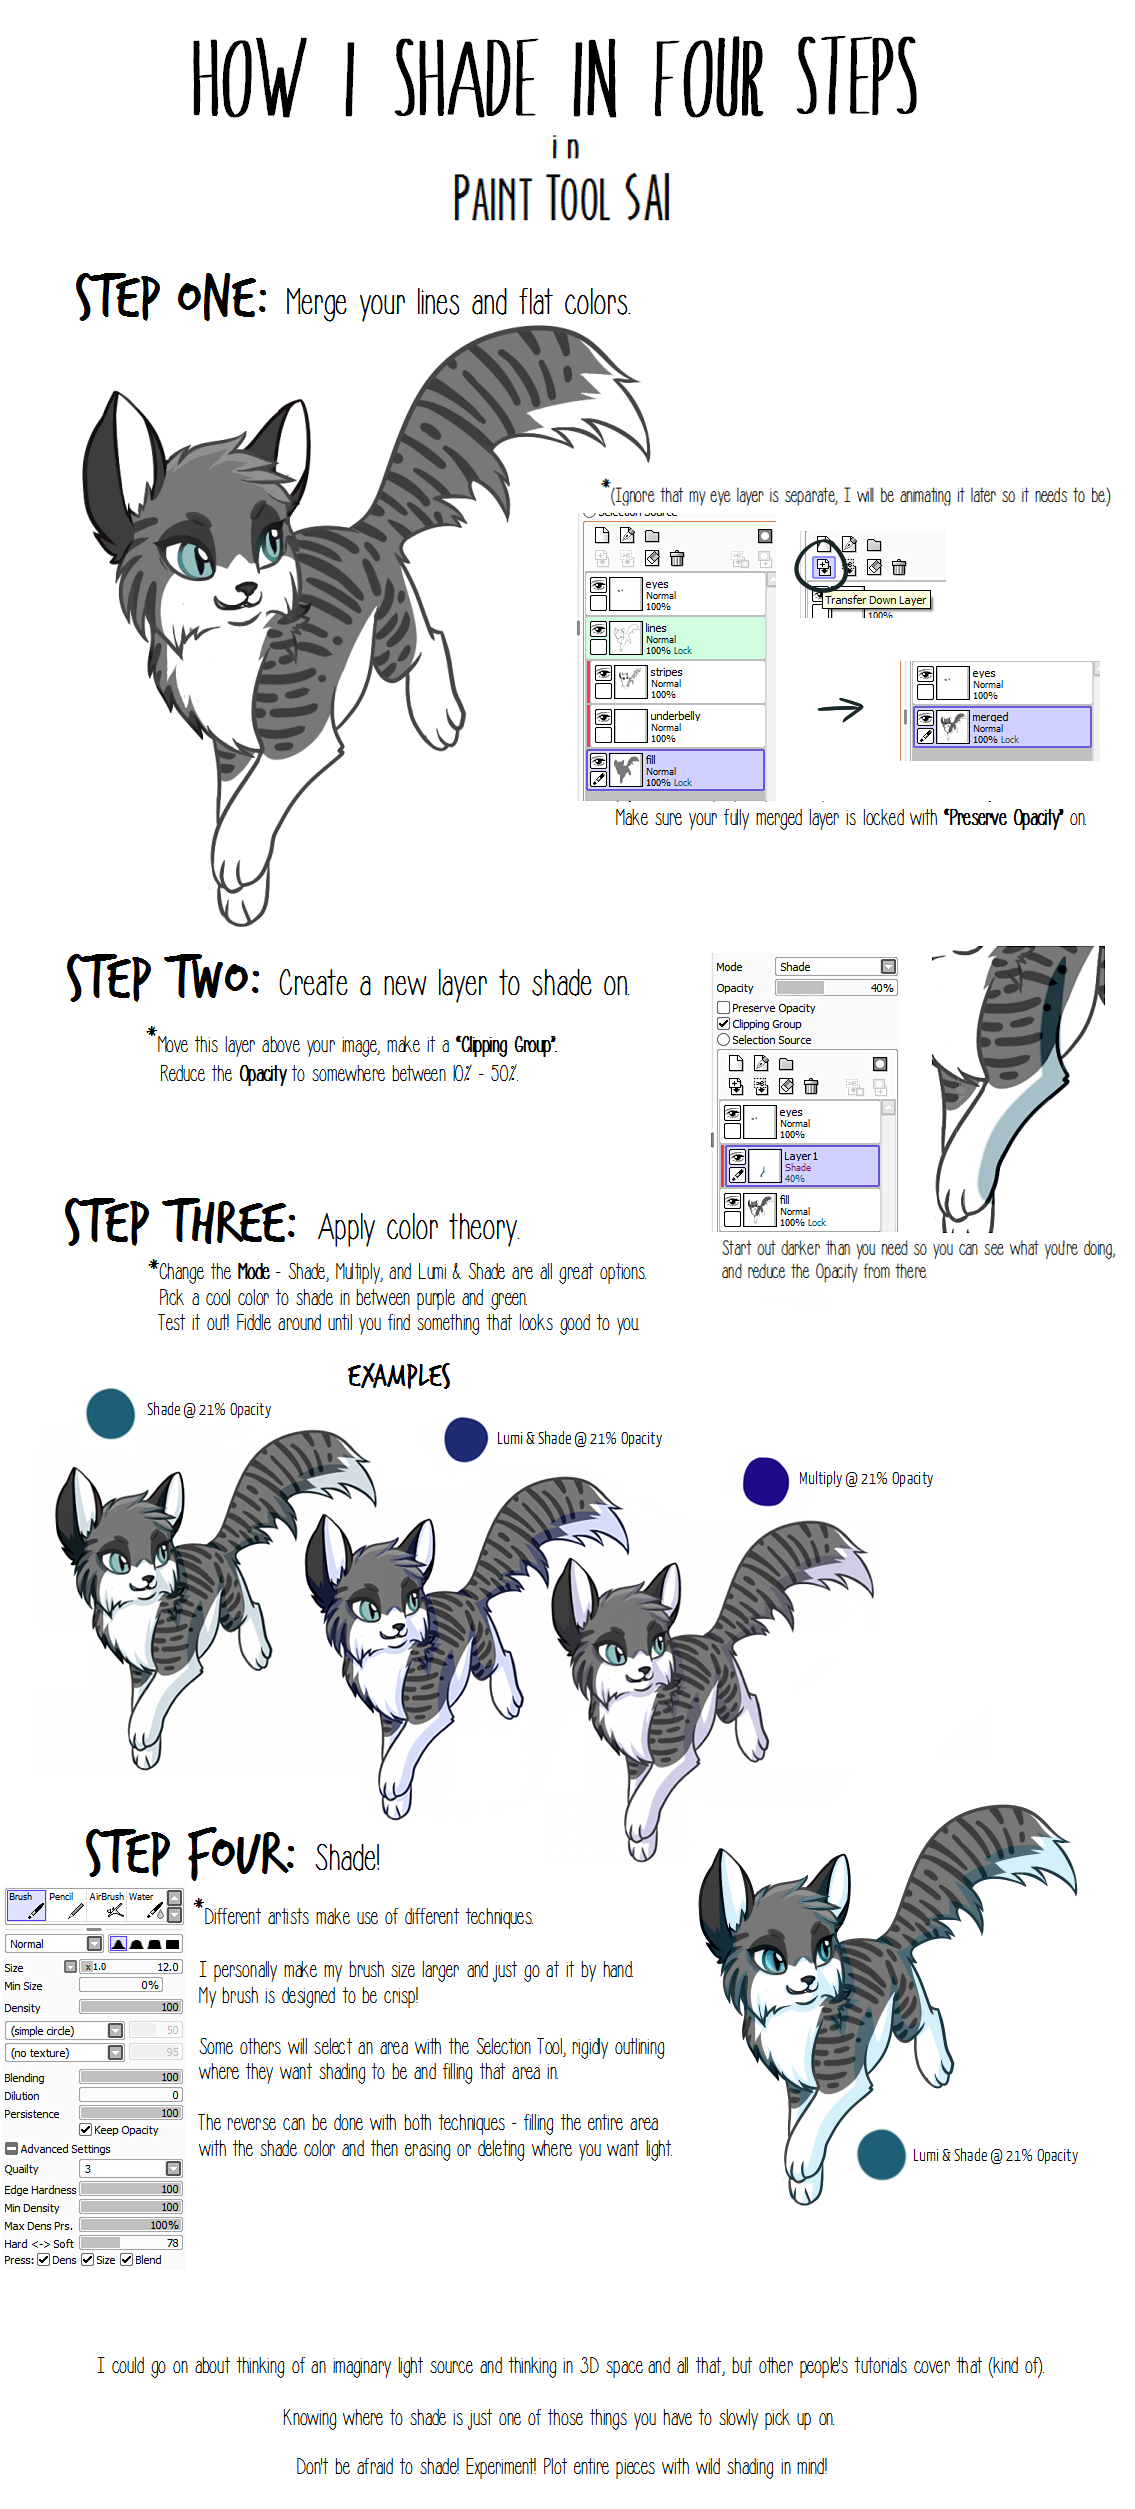
How I Shade In Four Steps
in
Paint Tool SAI
*(Ignore that my eye layer is separate, I will be animating it later so it needs to be.)
Make sure your fully merged layer is locked with “Preserve Opacity” on.
*Move this layer above your image, make it a “Clipping Group”.
Reduce the Opacity.
Start out darker than you need so you can see what you're doing!
*Change the Mode - Shade, Multiply, and Lumi & Shade are all great options.
Pick a cool color to shade in between purple and green.
Test it out! Fiddle around until you find something that looks good to you.
*Different artists make use of different techniques.
I personally make my brush size larger and just go at it by hand.
My brush is designed to be crisp!
Some others will select an area with the Selection Tool, rigidly outlining
where they want shading to be and filling that area in.
The reverse can be done with both techniques - filling the entire area
with the shade color and then erasing or deleting where you want light.
I could go on about thinking of an imaginary light source and thinking in 3D space
and all that, but other people's tutorials cover that (kind of).
Knowing where to shade is just one of those things you have to slowly pick up on.
Don't be afraid to shade! Experiment! Plot entire pieces with wild shading in mind!
Related content


Comments: 10

👍: 0 ⏩: 0

👍: 0 ⏩: 0


It means setting the layer to "Multiply" mode. I know this is a two-year-old comment and you probably knew this by now, but yeah that's what it means-
👍: 0 ⏩: 0


 (Smile)")


Awesome! This'll definitely help. ^^
Can you do a guide on how you draw your wolves?
👍: 0 ⏩: 1

Uhhh... well... I don't really draw wolves much? I drew one from a photo, and I've done YCH commissions (so same pose every time) for dogs and foxes -- so I got a few wolves in there. ^^; I'm afraid you'll have to look elsewhere for drawing tutorials.
👍: 0 ⏩: 1
Oh ok. ^^
I just sak at drawing animals lol
👍: 0 ⏩: 0