HOME | DD
 GriswaldTerrastone — Perspective Tutorial: 1VP 1

Published: 2010-10-03 20:14:01 +0000 UTC; Views: 11311; Favourites: 111; Downloads: 254
Redirect to original
Description
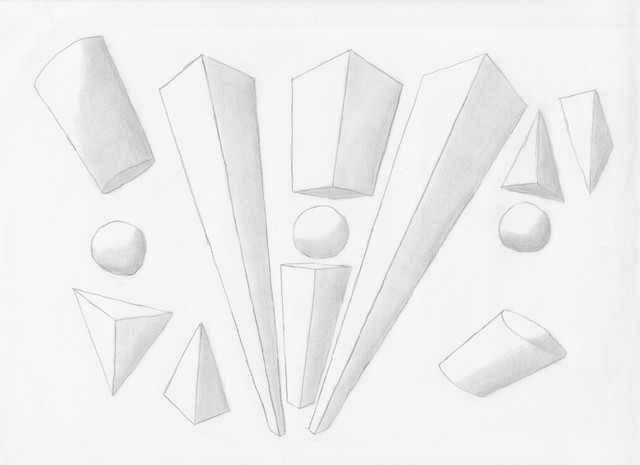
Well, here it is, page one of my tutorial!This shows the extremely basic views.
For this one, we must start from the upper left, and then move to the right.
The first view is of six sticks, seen from directly above. They are of the same size, equally spaced.
Next to it is a direct front view. Naturally, you can only see the nearest stick, since the others are blocked by it.
The next view is one that is in between the first two. Here, you see all six sticks, but from one end, at an angle. As a result, the near ones look bigger than the ones in the distance, and you'll also notice that the distant ones look closer together.
Now, right after that, we see two parallel lines, seen from directly above. They are, well, parallel.
But what's this? Next up are those two lines, seen from an angle, and now they seem to form a sort of "V," coming together in the distance- AND, they seem to be thicker when up close.
This, of course, is mere illusion in real life. Objects like those six sticks do NOT really get smaller the further away they are, and equally-spaced objects do NOT really get closer the further away they are.
Parallel lines of uniform thickness do not thicken or get skinnier, nor do they actually meet in the distance. It is merely subjective, an illusion- but vital, because without it, we'd have no depth perception.
In any artwork on any flat surface, be it paper, canvas, or computer screen, we are all just reproducing this illusion.
And so, here are a few helpful laws to remember- if you do, 60+% of it all becomes easier:
1) As an object is more and more distant, it looks smaller and smaller.
2) Equally-spaced objects, as they are further and further away, seem to be closer and closer together.
3) Parallel lines, seen from an angle, seem to converge (meet up) in the distance.
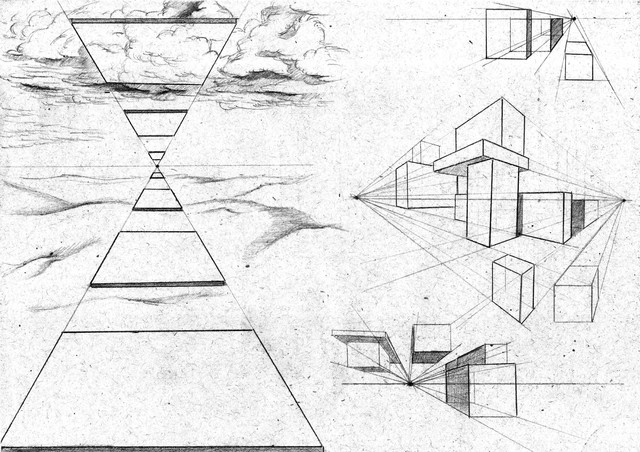
Starting on the second row, the first image combines the above, into a sort of flat train tracks. It merely obeys the three laws above- that's it.
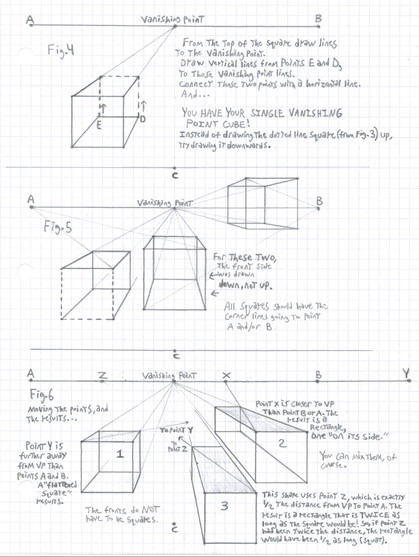
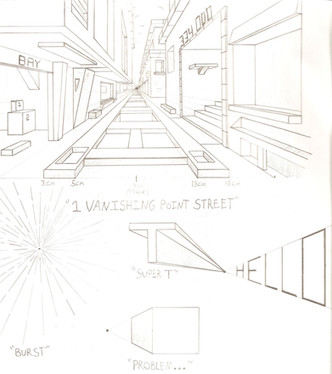
But now, it's time to introduce something that is going to be central to this, the first tutorial- the SINGLE VANISHING POINT. This is where the image ultimately seems to go, where it vanishes.
For the next image, the third dimension will be brought in (an illusion on paper, but...). This is seen from above, so the "sides" cannot be seen. Notice how a flat, long triangle is made "3-D" by drawing the rectangle at the near end.
Last, and far from least, are several images, all coming from the same vanishing point. A couple are "solid colored," while the rest are "transparent," as if made from glass. Notice the difference, how the triangle/prism is made that way by drawing in another triangle? See how the transparent cube looks like a transparent cube by drawing in another square?
Erase the lines not involved in the shape you want, and it looks like a lone 3-D object. Notice which lines need to be erased for the "clear" and "solid colored" ones.
But, above all, notice how all corners connect to that SINGLE VANISHING POINT.
This simple page is the basis of all else here. Know it, and the rest merely builds up from it, piece by piece, like a building made of toy blocks.
And now- time to enter the realms opened up by the Single Vanishing Point.
Enjoy the trip!
Related content
Comments: 8

👍: 0 ⏩: 0

I decided I wanted to be an animator.
I couldn't draw well. Still can't. At all. I mean I can doodle but...
Looked into Human Anatomy, perspective came in, so here I am.
Now here's the question,
Someone told me to start with the basics, after I've gone through all your perspective tutorials, what would be another good set of "basics" to learn?
👍: 0 ⏩: 2

lines, shapes, shading, and practice
👍: 0 ⏩: 0

In my experience with this tutorial, which has been growing as I myself figure out these things, it's much like math: before you learn multiplication and division, you learn addition and subtraction. Before you learn that, you learn counting.
Things build upon earlier things.
In the case of this tutorial, start with the basics on 1VP. Learn how and why you get a 1VP square and cube. Think about how to apply it overall: for example, in the part on checkered floors, would that not mean that the rows are all the same size? Yes- so if you section off the walls as shown, you can- by applying the part on how to center doors- draw a hallway with evenly-spaced doors. Those two parts combine to give you something else.
But you actually have to understand it.
Since much of the 2VP section actually involves 1VP- look at any 2VP block; do the sides not each look like 1VP shapes?- by understanding 1VP you can easier understand 2VP. Because drawing doors and windows on the sides of 2VP blocks would be much like doing so for a 1VP side.
And so on. As you understand more, you have more connections in your learning, and can better apply it all to what you need.
By "other set of basics," I assume you mean things like backgrounds, humans, color, animals, anthros, machines, etc. Unlike perspective, that is a tough one, because they are subjective, and I don't know what you want to do. I draw roughly Decarlo-level human females in the "Ar-Kenjanians vs. Golem-Mice" pictures- but someone else might draw Manga-style humans and more Disney-style mice. Maybe Firleena would look more like Space Ace's Kimberly (Bluth).
Some outline in black. Others outline in color. Some combine the two.
So the first thing you'd have to do is decide what it is you actually want to do. It can be more than one thing, but even in subjective things this can help:
There are certain basics that apply to real-life things. To draw a human face- for starters- try this:
1) Draw an oval. Do not make it too fat or narrow.
2) Draw a "+" in it, centering the "+" at least pretty well.
3) On the horizontal line put a point in the center of the left and right halves of the line.
4) With another horizontal line, divide the bottom half of the oval in half.
Now, where those two dots are draw in two oval or roundish eyes. Between the two horizontal lines, starting between the eyes, draw the nose, even if it's nothing more than a bent "L." About halfway between the lower horizontal line and the bottom of the oval, centering on the vertical line, draw a mouth.
At the ends of the top horizontal line draw in ears. Finish up with eyebrows and eyelids.
You have the basic human face.
A good start is to learn from extremely basic pictures on things, so you can get the basics down. There are tutorials on many things here at DA, so you can type in what you'd like and see what comes up. Just remember to start with the basics first, then go from there. Since much is interconnected (learn to draw a good anthro and you can draw a better human, and vice-verca), try some of this and some of that as you go; focusing on one thing tends to make one specialize too much on that.
Did this help?
👍: 0 ⏩: 1

I like how you compared it to Math in the sense of building on preexisting knowledge. It did help, gave me a new way of looking at it.
👍: 0 ⏩: 1

Great- keep me up to date, and good luck!
👍: 0 ⏩: 0

Aha, When I try to learn perspectives, I will definately refer to your tutorials
Faving them as of now. Thanks for this BTW
👍: 0 ⏩: 1

