HOME | DD
 GriswaldTerrastone — Tutorial: Same-Width Arches 2

Published: 2011-09-28 21:38:28 +0000 UTC; Views: 2994; Favourites: 57; Downloads: 108
Redirect to original
Description
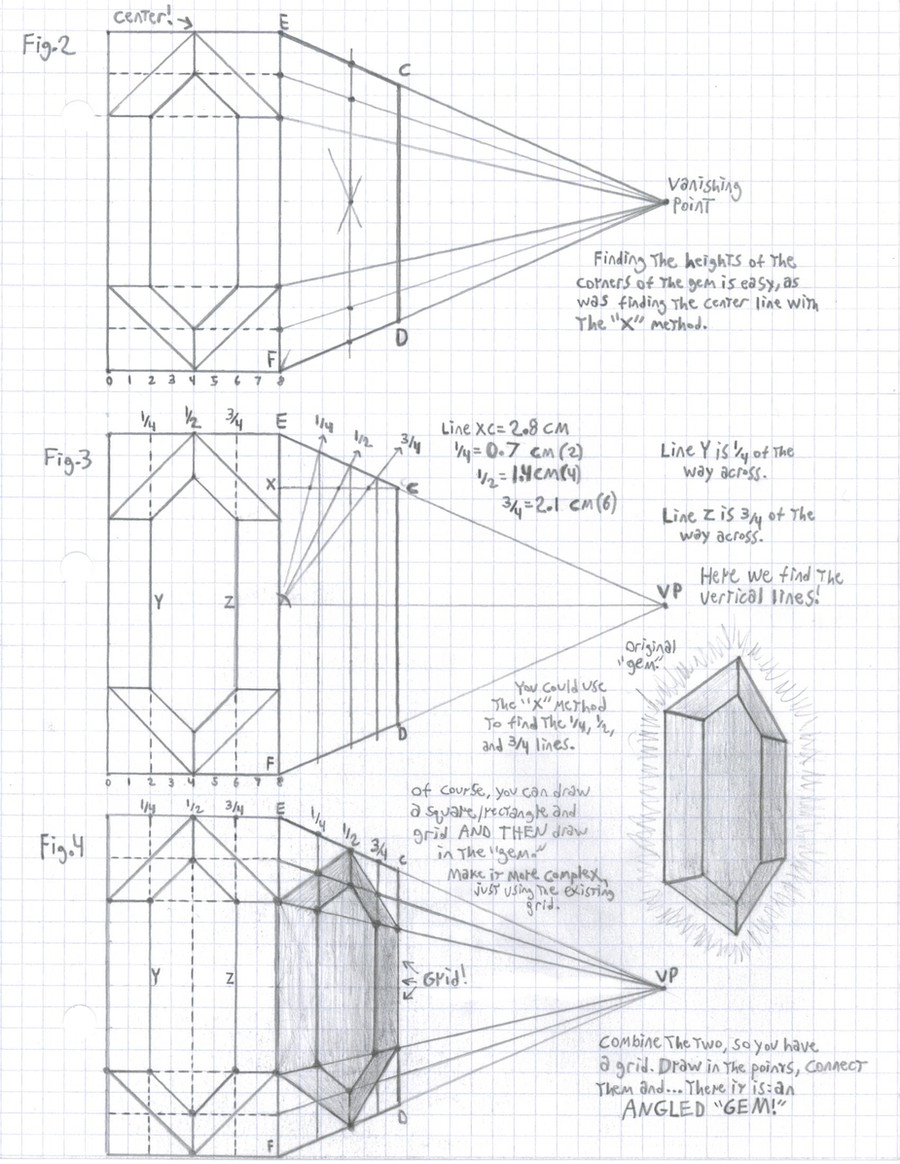
In part 1, the technique used for drawing "evenly wide edged" arches was shown in a straight-ahead view.But that could be done with a ruler, a marked scrap of paper, or almost anything else.
Will it work with an angled wall?
Yes.
In Fig. 6, once again the almost-all-purpose "X" was drawn, and- since this can be either a wall from a single or two vanishing point image- a straight vertical line was drawn through the center. Now we know where we can put the top of the arch.
Since this is an angled wall, to find the two other points one was chosen, and a line from the VP was drawn through it- which tells us where the other point on the other side goes. (As always, any two points on the same VP line will be at the same height).
We now have the three "outer" points. Just as before.
For Fig. 7, a reduced square was drawn. We already have the vertical line for the top point drawn; from the two side points lines were drawn to the center of the "X." Where all three lines touch the reduced square is where the three "inner" points will go.
In Fig. 8, the proper points were connected, and the side vertical lines were dropped down. I shaded the whole thing to make it easier to see, but really, except for the VP line in Fig. 6, this is really done the same way as in part 1.
And that's it. That's how to do it.
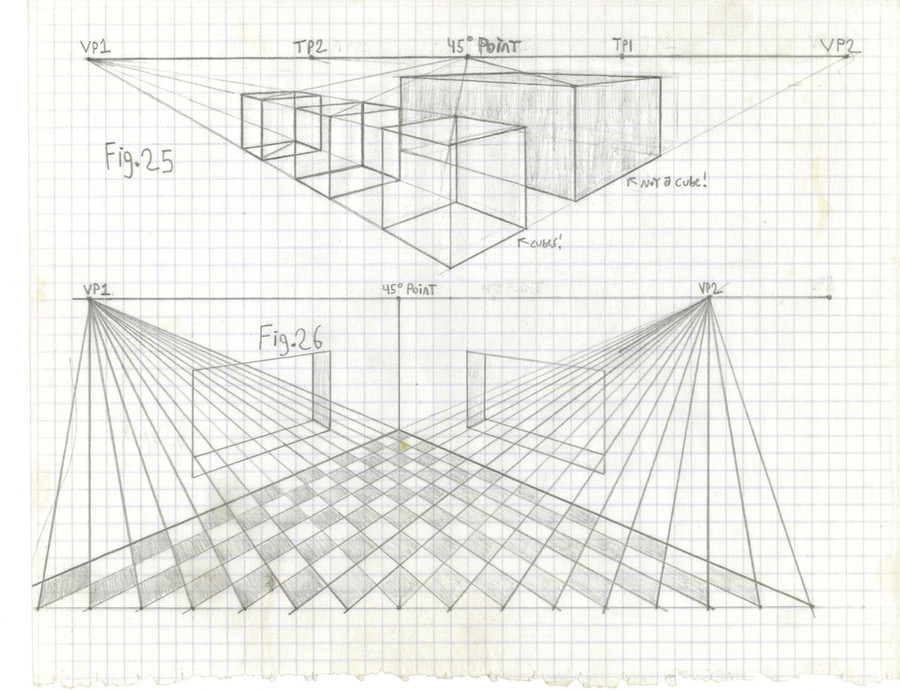
Now, if this had been a THREE vanishing point image, the only difference would be that the vertical lines would go to the third vanishing point, instead of being automatically vertical. But other than that, this would be done the same way since the mechanics behind it are the same.
If you wanted a line of these doorways or windows along a wall and all the same size, you would simply remember that ANY point on the same VP will be at the same height. Thus, all of the arch-tops would be on the same VP line, as would all of the outer corners, and all of the inner corners, as well as the bases (if these are windows with the bottom part above the ground).
When you break down what you want to do and handle it one step at a time, it often isn't as intimidating as it first seems. By combining different parts of this tutorial, for example, a pretty complex cathedral could be drawn, for example. It's all based on its component parts.
Enjoy!
 (Smile)")
Related content


Comments: 4


Thanks!
Let me know what you like- or don't like- about it?
👍: 0 ⏩: 0
Man, I'm a slow typist- the text for this one'll be done next time, but that's it for today, I'm afraid.
👍: 0 ⏩: 0