HOME | DD
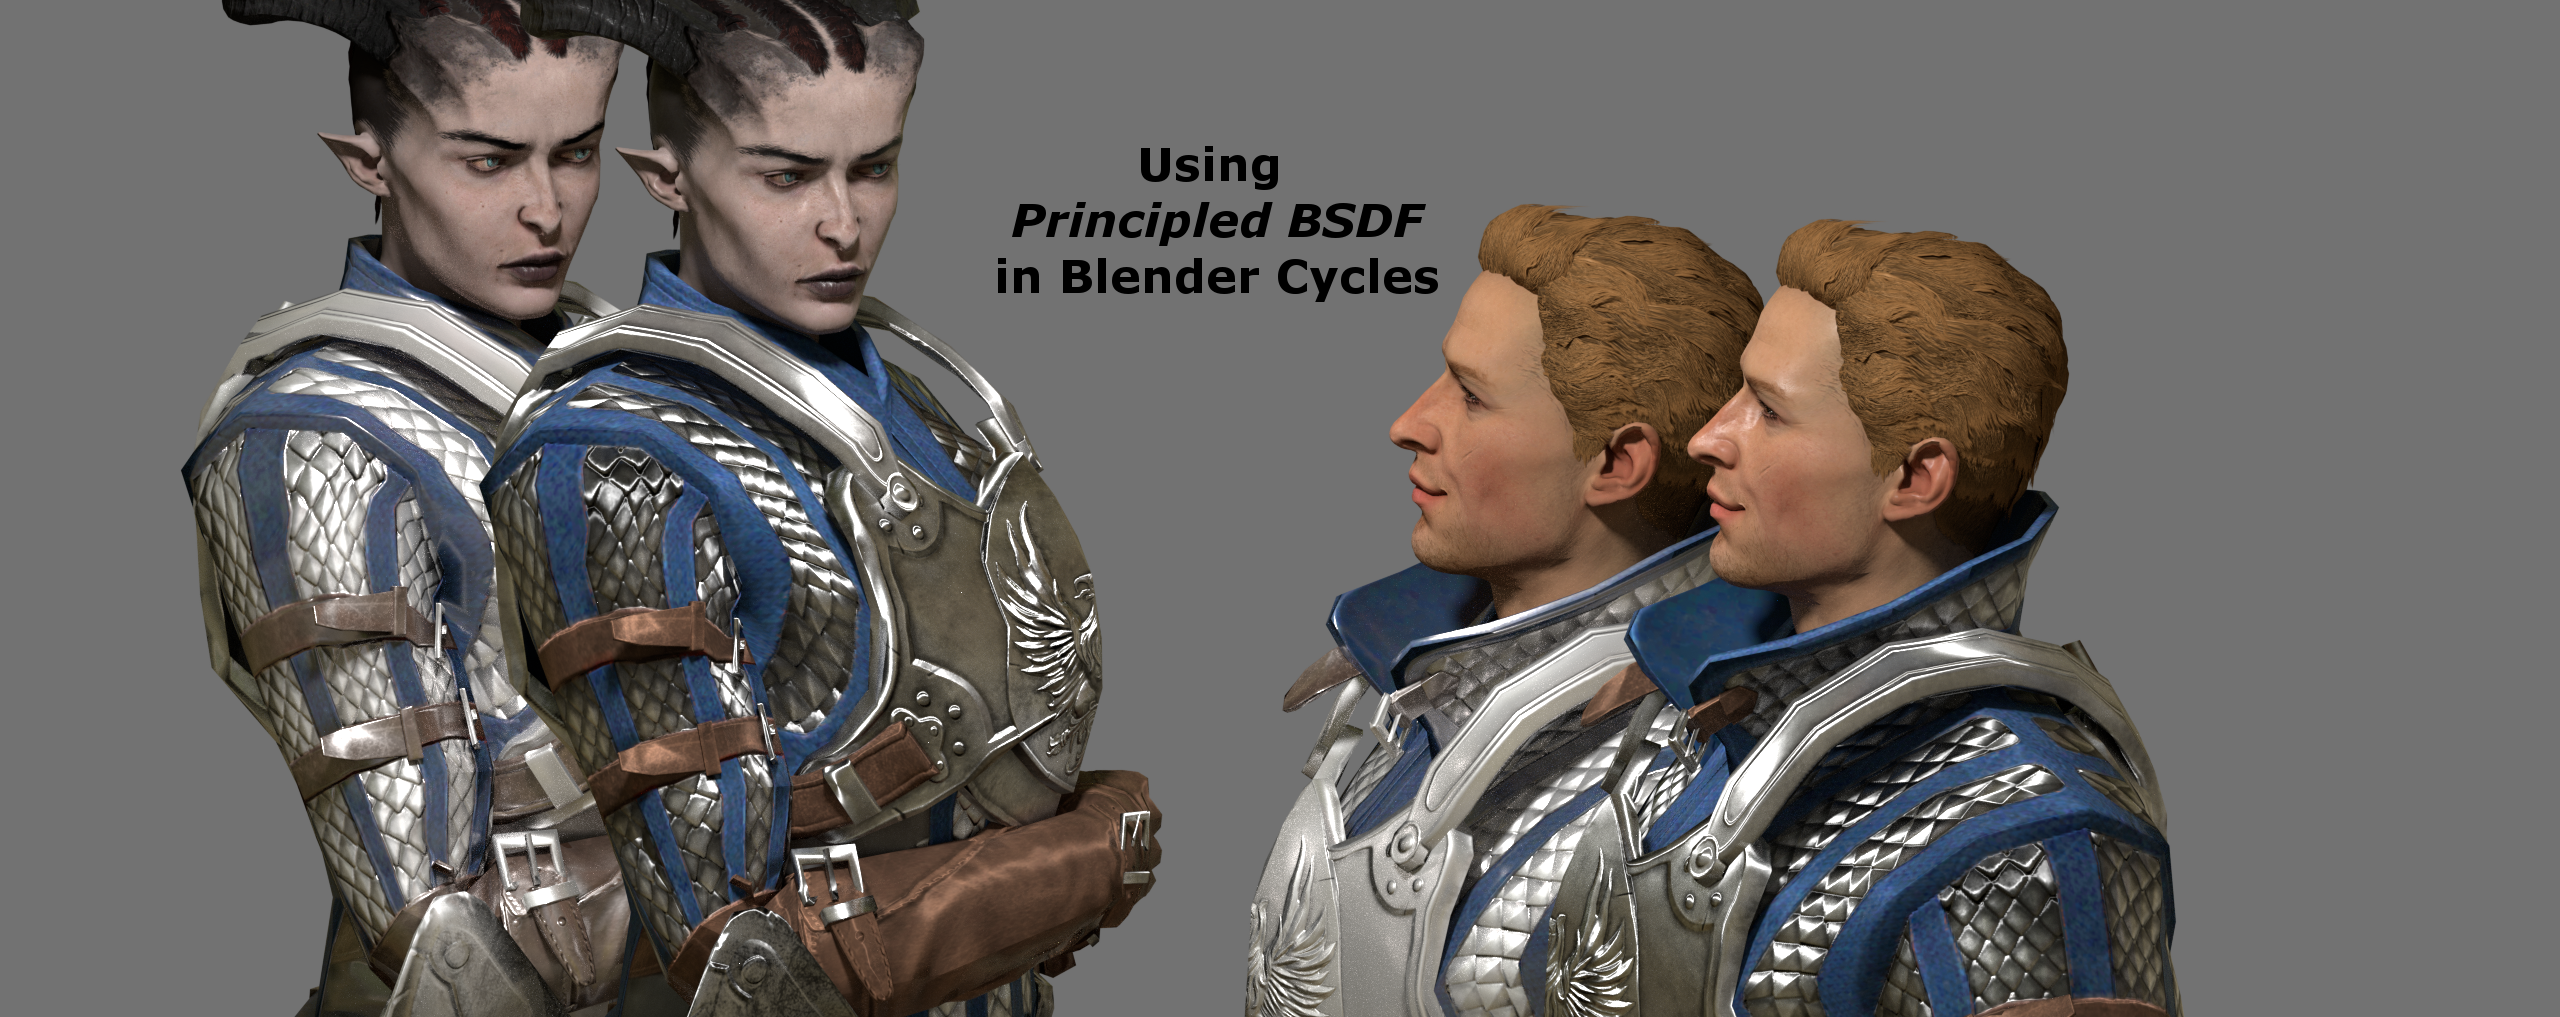
 Padme4000 — Using Blender Cycles to Render

#blendercyclestutorial
Published: 2015-03-02 01:20:21 +0000 UTC; Views: 9479; Favourites: 64; Downloads: 1076
Redirect to original
Description
No idea why the PDF isn't showing up so please download using the download button to the right.I made this tutorial for those who might like to try their hand at rendering in Blender cycles using their posed models from XPS.
Also for Maiqueti to show how to make Mass Effect emissive scars show up in cycles.
I will warn you it is a very long as I first explain how to add texture nodes using basic node set ups. Also explain how to be able to choose between CPU and GPU rendering. How to move the camera, lights and render. More in depth nodes. Also how to set up samples and environment texture.
I might make another tutorial on setting up a scene in cycles but the nodes will pretty much be the same as those I have shown in this tutorial.
If you wish to pose your model in blender there is a very short tutorial at the end that shows you the basics. I can't really explain further than that as its usually based on how each person likes doing things.
The emissive scars and eye textures I extracted from the game and turned white so you can change the colour to what you want in cycles; sta.sh/214p3p0ixi5l
Tools;
Blender Import/Export XPS Script: Blender 2.7x XPS tools 1.4
Blender; www.blender.org/download/
Credits;
Tutorial by Padme4000
Me4Fan for ideas on node set ups and help with linking me to sites for node set ups. Others I learnt myself by playing around with the nodes.
Dragon Age/EA/Bioware
No copyright infringement intended. this is a fan-created work for non-commercial use
Related content


Comments: 18

hey I am trying to follow this tutorial but the textures for the eyelashes are versed. This is what it looks like: Lashes Thanks for making this tutorial I know its the model I am using because it has weird eyelash textures but if you are able to help that would be awesome.
👍: 0 ⏩: 1

If you invert the texture so the black is white and the white is black.
then in gimp after invert go to color then color to alpha and press enter. Then save it. It then should work with the node setups in this tutorial. Sadly not too sure how to make a
colour into alpha in other programs.
Hope this helps.
👍: 0 ⏩: 1
Thank you it did work but for some reason parts of the eyelashes are blocky. Its probably the model though. Render3 I'm going to try with a mass effect model probably will get a better result.
👍: 0 ⏩: 1
It could be the model but it looks more like a problem with the texture. But I hope you have more luck with future models.
👍: 0 ⏩: 0

Thanks so much for this!!!!!!! I really love your eye setup haha
👍: 0 ⏩: 1
Hope it helps  (Smile)")
👍: 0 ⏩: 0


Thank you. I am glad you think so
")
👍: 0 ⏩: 1

No problem!
👍: 0 ⏩: 0

Again it's very well done
I know I said this before, but it's a lot of work creating those tutorials and it's very kind of you spending your time doing those stuff cause a lot of people can benefit from that.
I especially like how you're working with the pics in the tutorial. Very vivid and good in understanding. I think I can learn from that too
So keep up your excellent work that we all become some blender experts  (Wink)")
👍: 0 ⏩: 1
I really is a lot of work. Took me all week to do it. Didn't spend too much time on it each day but I did it a bit each day so it wouldn't overwhelm me.
Thank you hun and I am glad you think so. I never know if I am doing it right. Or explaining myself very well.
👍: 0 ⏩: 1
Yeah it's quite exhausting. When I did one I thought in the beginning that it would take less time, but it's really a lot of work...
You did well and good for understanding and I'm sure many people will appreciate that

👍: 0 ⏩: 0

Thanks hun though she is an OC of mine that is related to Shepard. But I am glad you like her
👍: 0 ⏩: 0

Thank you soo much for taking the time to do this!
I look forward to apply this in my renders

👍: 0 ⏩: 1
You are more than welcome hun I hope it helps
👍: 0 ⏩: 0

Thank you for explaining CPU/GPU. Really comes in handy for me since I normally don't use effects in my renders. Yay for shorter render time now.
Thank you for the tutorial more cycles help is always a good thing.
👍: 0 ⏩: 1
If you use Subsurface scattering node at all change the Supported to Experimental where you select CPU and GPU then it will use those nodes. That was one thing I forgot to mention in the tutorial. The supported GPU doesn't use those for some reason.
But yes always good having shorter render times. Also some lighting effects look better with GPU.
No problem I am glad that the CPU/GPU helped and hope that anything else will help.
👍: 0 ⏩: 0