HOME | DD
 90Sigma — Tutorial: Clipping and Masking
Published: 2012-05-16 09:31:42 +0000 UTC; Views: 4498; Favourites: 32; Downloads: 136
Redirect to original
Description
This is a tutorial intended to demonstrate clipping and masking in Inkscape with some (hopefully) practical examples. While they use ponies as an example, they are not specific to ponies and can be used for any purpose.Clipping is a fairly basic operation whereas masking is more complex. I wish I learnt masking sooner, because it would have been incredibly helpful with some earlier vectors.
I do not promise that this is the best or only way to do these things. It is a simply a way to do them. Nor do I promise complete accuracy; these demos show only my experience in the use of these tools.
Download the ZIP file to get a PDF copy of the tutorials, MP4 videos and Inkscape SVG files.
The original MP4 videos without the script is available on SkyDrive .
The completed vectors are available here: CMCs as Flower Fillies , Cadance's Cutie Mark , Detective Twilight Sparkle and Spitfire Hovering .
Reuse: You may not reuse, repost or redistribute the ZIP archive or any file contained within. The vector files contained within were edited for the demo and are probably not suitable for reuse purposes. Use the above links for versions you can reuse.
Addendum: Inkscape appears to have issues with masking if the SVG file is opened in other programs. Consider using clipping instead if possible.
All pony characters, the Wonderbolts and My Little Pony: Friendship is Magic are the property of Lauren Faust and/or Hasbro and/or others.
Related content


Comments: 34


Ayy, Sigma!
This is a very nice tutorial, rich with content and examples.
However, as someone who has never before used clipping or masking, I feel that the tutorials did not adequately explain everything about them. Yes, the examples given were very nice and reusable, but I'm a bit overly picky, especially with details.
AS stated, however, I'm still a newb in relation to this particular topic, so I cannot really say anything. Maybe I just missed an important detail. Who knows.
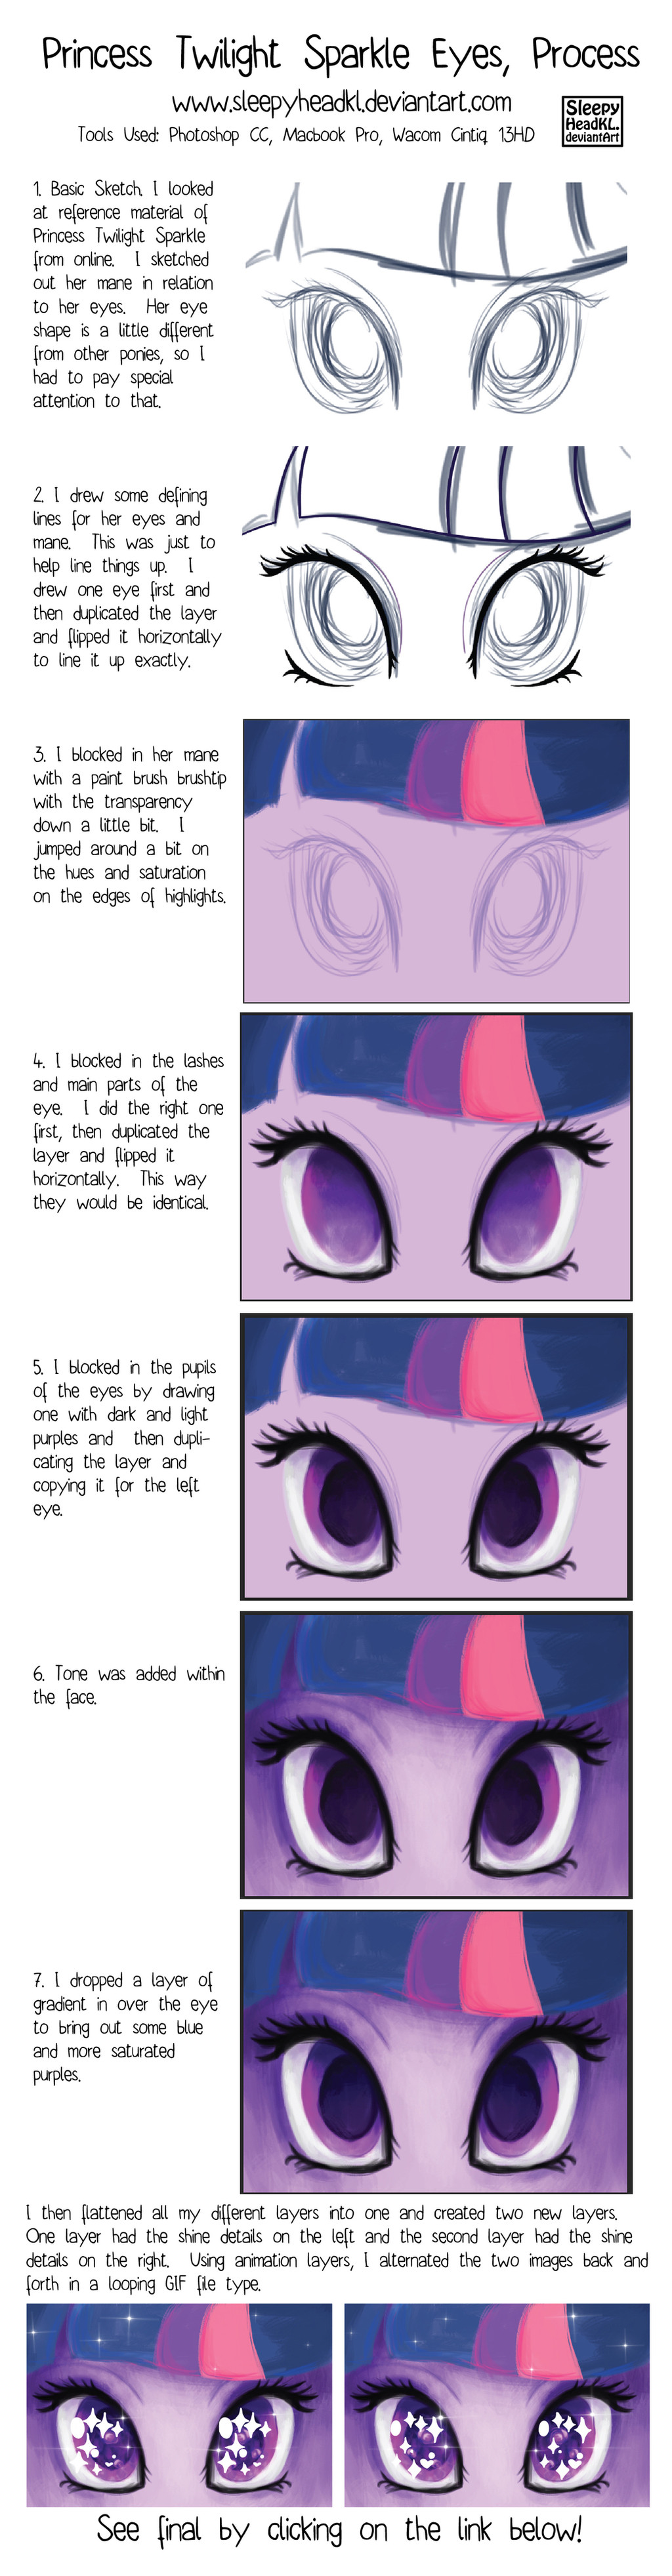
I came here specifically for the how-to's on a pony's eye. Though I can already string my way through the process of making one, ~MIDI-gun here has asked me to teach him, which I cannot currently do. I referred him to this tutorial in blind faith, but now that I have seen it for myself I can see why he is reaching frustrations. I will use the content within to help me better understand these clipping and maskings, and hopefully I will develop my own reusable method to make pony eyes.
My criticisms aside, the tutorial files have opened my eyes to new things in Inkscape, and they have set me up to go discover my own methods. I thank you, Sigma, for taking the time to make this. I hope you continue to create content for the embetterment of the community.
👍: 0 ⏩: 1

This is a very early 'tutorial' and I don't really recommend it. I should probably remove the word tutorial from the name.
You can chat with me anytime you need help, and I'll try to walk you through it and explain it.
👍: 0 ⏩: 1
Thanks for the offer!
But I did find my own process. It's not as reusable as I'd like most vector stuff to be, but then it's okay because it's simple.  (Smile)")
👍: 0 ⏩: 1
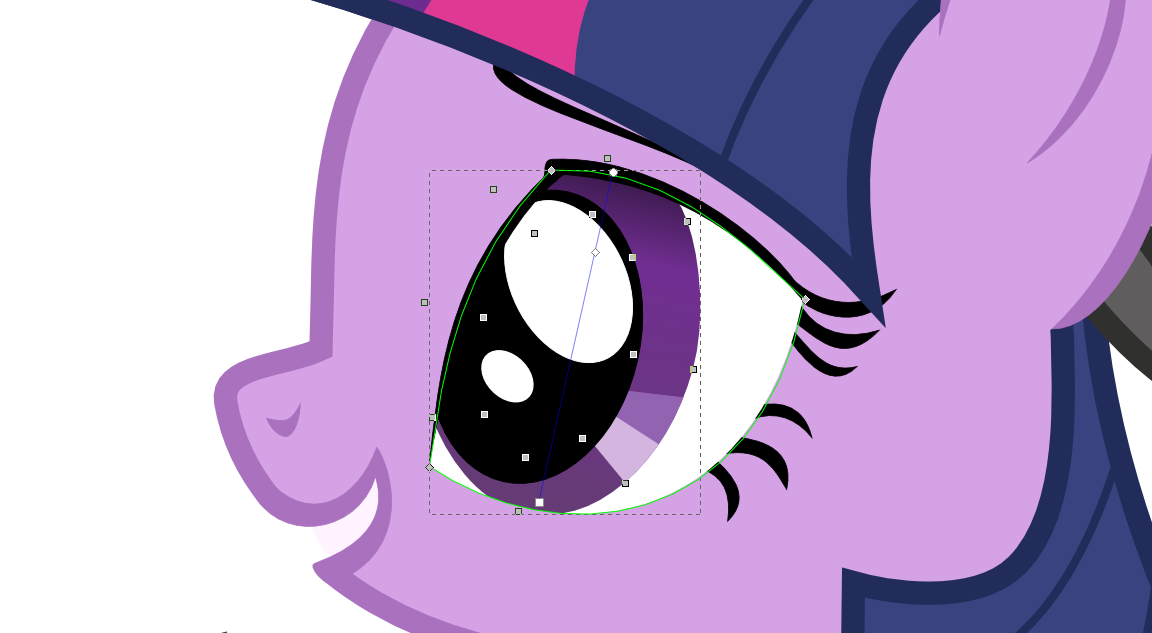
Clipping is usually better because I heavily reuse the clipping paths. One path for the iris, pupil and (if necessary) eye shadow.
I'll stream the process to you if you want me to?
👍: 0 ⏩: 1
Sure! I'd like to watch you make an eye from start to finish sometime.
👍: 0 ⏩: 1
Your wish is my command! Demo: Drawing Eyes .
PNG reference and MP4 screen capture.
👍: 0 ⏩: 1
SO that's where you've been all this time
I'll have to check this out when I have the time.
")
👍: 0 ⏩: 0

ummmmm im terrible with vectoring so i would need someone to show me how to do this like through skype or something.
👍: 0 ⏩: 1
There is a video you can watch in the ZIP file download, and a PDF file to read if you prefer. If you have any questions after that, feel free to ask.
👍: 0 ⏩: 0

It takes a few steps:
Draw the head with fill and stroke like normal.
Duplicate it (Ctrl+D) and do a Stroke to Path (Ctrl+Alt+C) on it.
Select the original (still has fill) and set to No Stroke.
Draw the eye-holes.
Select an eye-hole and the head fill, and use Difference (Ctrl+-).
Repeat with other eye-hole.
Draw a white shape that covers the holes, then send it to the bottom (End).
Then when you put the eyes in, you just put them between the head fill object and the white shape you drew.
👍: 0 ⏩: 2
You don't need to do a duplicate of the head and difference operation to create eye holes. You can do the eyes on a higher layer above the head. The only time I need eye holes is for the Wonderbolts suits, and that's only because I made it so you can wear the suit without the goggles.
👍: 0 ⏩: 1
iv the eye put aside so this is why i use the eye hole but every1 is diferent ^.^
👍: 0 ⏩: 1
Yep. There's no 'right' way to make these things and everyone has different methods. I personally think clipping an eye on a higher layer is easier, but you might think your method is easier, and that's OK as well.
👍: 0 ⏩: 1
agree'd im not a fan of clipping because iv per done parts and easy to just move the eyes lol
-yes its cheating-
👍: 0 ⏩: 0
thats my way so all you need to do the puples is a black and colour circle linked
and now you can a just for easy ^.^
👍: 0 ⏩: 0

I have a question on both Clipping and Masking. I use illustrator, but it should still be the same thing. Basically, why do you have the things overlapping in the first place? Every tutorial I've read and the way I learned to Vector, you just follow the lines of the original image. If they were not overlapping why would one draw the entire thing overlapping? Is there an easier way to vector that I have missed? Please elaborate!
👍: 0 ⏩: 1
I am not sure exactly what you mean by overlapping. Could you please give me a specific example?
👍: 0 ⏩: 1
Like okay; In your example with Soarin's suit. You show the lightning bolt completed and then use masking to fit it the suit.
Where the way I learned to vector, the lightning bolt wouldn't have been completed as one would just vector it the way the screenshot had it.
Is the second the hardest way and perhaps there's an easier way?
👍: 0 ⏩: 1
It is much easier to draw the mark as a separate object, place it over the suit and then clip it (or mask it if you prefer). This will align it for you and saves you trying to align the separate objects manually.
I hope that answers your question.
👍: 0 ⏩: 0

hhm, nice tutorial but you could make it a bit simpler by using duplicate (ctrl+d) instead of ctrl+c and ctrl+alt+v to copy and paste, because duplicate does the same thing (afaik) and the duplicated object is on top (concerning z-order) so right where it belongs for clipping :>
👍: 0 ⏩: 1
I can't say I've ever used duplication. IIRC, I tried once, but couldn't do clipping or something... I don't remember. I'd have to check it out.
Thanks for the feedback!
👍: 0 ⏩: 0
It's an MP4 video. Windows Media Player on Windows 7/8 can play the file.
If you have an earlier version of Windows, you might need something like VLC.
👍: 0 ⏩: 1
iv win7
but i havent heard/seen it?
👍: 0 ⏩: 1
ow poop think i got 2 msg's mix up?
👍: 0 ⏩: 1
yeah sorry , lack of sleep can muck things up .well latrs
👍: 0 ⏩: 0

Awesome ")
👍: 0 ⏩: 1
I didn't upload it as a RAR file, I uploaded it as a ZIP file
Yeah, masking was something that was always "WTF?" every time I tried to use it, until I actually took the time to read about it and try it out properly.
Feedback is always appreciated! I hope you find it useful!
👍: 0 ⏩: 1
This phone is derp... in the DA page is a zip file, but in the phone is a .rar file :S
I'm sure it will be very useful, like your first tutorial
👍: 0 ⏩: 0