HOME | DD
 suzuran —
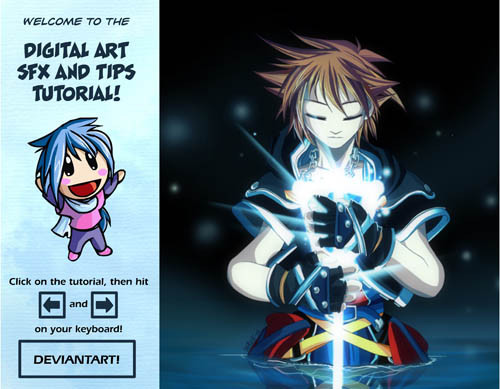
Wave's SFX Tutorial
suzuran —
Wave's SFX Tutorial
Published: 2010-10-26 22:04:02 +0000 UTC; Views: 80259; Favourites: 4241; Downloads: 3843
Redirect to original
Description
finally!! Here's my SFX tutorial (Smile)") Sorry for the long wait guys, I hope that when you flip through it you can see why it took me so long to get this out!
Sorry for the long wait guys, I hope that when you flip through it you can see why it took me so long to get this out! (oh dear please ignore my crummy animation in the beginning T_T;;
 (Wink)")
Hopefully it's helpful
If you have any questions, please feel free to ask more than once! Sometimes when I just read through stuff and I'm tired, I forget to respond!
Click here to see the final image that I used for the tutorial! [link]
Click here to download the Source File! [link]
---------------------------------------------
ee, a DD, thanks so much and , and thanks everyone for your support ;___;

Related content


Comments: 662

Wonderfull tutorial!
Make an adjustment layer with a gradient fade from black to transparent.
Thanks for sharing!

👍: 0 ⏩: 0

Waah ~ I rly like how u made soras necklace, to bad to crown got hidden behinde to keyblade D:
👍: 0 ⏩: 1

haha XD doh XD that happens when I do things sometimes ;__;
👍: 0 ⏩: 0

um i am kinda more confues now because id ont really understand the folder for the layers the quick mask tool the or effects for the hair when using the brush and i really kinda got confues through out the whol tutorial sorry about this but i am kinda more confues now
")
👍: 0 ⏩: 1
Well, if you want me to break specific things down for you, just ask
👍: 0 ⏩: 1
well for starters i dont really understand the quick mask tool on how it works
👍: 0 ⏩: 1
Ooh. Well, you know how when you usually select stuff, you have to use the tool, and kind of drag it around, telling photoshop: "I want to select this!" So if you select like the outline of a stick figure, let's say, you'll have to be very careful going around the sides...
Whereas, with the Quick Mask tool, when you activate it, you can just DRAW your selection
Does that make more sense?
👍: 0 ⏩: 1
ok thx now i understand the quick mask tool now what i dont understand is how to use the blending mode on the brush mutiply mode on the brush and the linar doge tool also on the brush and oen mroe thing is in on of tutorial you said something about detail brush may i ask which one is that? and thank you fro your help XD
👍: 0 ⏩: 1
If you look under your brush options, where I pointed out you can change the brush to Mutiply or Linear Dodge, it's really just to change your brush into.. well, in simple terms...
Multiply will Darken the colors of what you draw over with the brush
Linear dodge will brighten the colors of what you draw over with the brush
And the detail brush is just the non fuzzy brush
👍: 0 ⏩: 1
ok thx for telling me now the enxt thing is what i dotn undertsnad is how to shade in photoshop each time i try to it doesnt look the way i want to so i as wondering if you explain to me how to shade in photoshop and thx you been a big help XD
👍: 0 ⏩: 1
Well, that takes more than a simple explanation
👍: 0 ⏩: 1
ok thx now kinda wnat to know what are vectors exaclty
👍: 0 ⏩: 0

This is great. I really needed the part with the water.
👍: 0 ⏩: 1

Aghhhhhh sorry for asking multiple questions but ; A ;
I'm using Photoshop 7 and don't have the warp too, so I can't use the warp tool to adjust my water. What would be a good alternative?
👍: 0 ⏩: 1
Mm, is there a perspective tool?
👍: 0 ⏩: 1
Nvm, I used Shear instead. Thanks anyway c:
👍: 0 ⏩: 0
'May I ask what you used to make this? c: (The tutorial itself, that is. I'd have to be pretty stupid to not know what you used to make the image xDD)
👍: 0 ⏩: 1

You definitely deserve the DD
This tutorial is just so..WOW, it covers practically all of the SFX that i'd like to use in future artworks. The way you explain is really easy to understand so thank you so much! 


👍: 0 ⏩: 1

This is such a beautiful tutorial, the only thing that i have to nag about is that you could have warped Sora's reflection in the water a bit, since the water has ripples and isn't still. You would only get a mirror like affect such as that in still water :3
👍: 0 ⏩: 1
haha, you're right!
👍: 0 ⏩: 1
You're welcome,
.....did an amazing artist drenched in awesomesauce just accept a critique from me... omfg

👍: 0 ⏩: 0

Aww very cool!!! thanks a loot!!!!! congratulations on your DD ^^
👍: 0 ⏩: 1
you're very very welcome ^^
👍: 0 ⏩: 0

I really like this tutorial... <3
thanks u very much ^_^ ~<3
👍: 0 ⏩: 1

yay! i'm glad it's helpful ")
👍: 0 ⏩: 1

This is a great tutorial! Can't wait to try out your tips!
👍: 0 ⏩: 1
ee, thanks for thinking so! 
👍: 0 ⏩: 0

;_; this is a delicious tutorial, but too bad i don't have CS4....I have SAI
👍: 0 ⏩: 1
your icon is delicious too O___O but awee ;__; I wish SAI had more flashy effect functions XD
👍: 0 ⏩: 1
thankyew xD yours is too~ :3 my friend made it for me.
my parents dont approve of wasting money of Photoshop tho, and i can't find any free versions out there
👍: 0 ⏩: 1
awee ;____; That's so sad! I heard people use GIMP a lot because Photoshop can't offer them that.
👍: 0 ⏩: 1
i've tried GIMP, but its not really my taste xd
👍: 0 ⏩: 0

thank you very much!!!
the displace filter you used also works on Gimp!!!
I always wondered how I would do that with water reflections, instead of Iwarping if for hours X)
Thank you so much!!!
👍: 0 ⏩: 1
ee! sweet! thanks for letting me know that!!
👍: 0 ⏩: 1
Your welcome
Ya know a lot of the things I learnt on gimp I learnt it from Ps tutorials.
they basically have most of the same tools and filters but their usually located in different places or named differently
Perfect example, on this tutorial you went to Filters>Render>Displace.
On gimp I had to go to Filters>Map>Displace. But it basically all does the same thing
👍: 0 ⏩: 2

you said the warp demostration works in gimp? O.o
👍: 0 ⏩: 1
Yeah you can warp or Iwarp your images on gimp.
Just got to Filters>Distorts>Iwarp
then a window will pop up for you to choose what kind of warping you want to do, like grow, shrink, move, or swirl left or right.
you can even choose the radius of the warping tool.
I used it to warp this piece [link]
on to this piece [link]
It works really well you just gotta play with it a bit
👍: 0 ⏩: 1
wow that's whatsup
👍: 0 ⏩: 1
your most very welcome ^^
👍: 0 ⏩: 0
ooh that's good that it's that similar
I like how all the programs have some degree of similarities, this way I can at least help people using gimp from a Photoshop perspective
👍: 0 ⏩: 1

<= Prev | | Next =>